Showing posts with label #digitalscrapping #projectlifeapp #projectlifeeveryday #pocketpage #projectlife. Show all posts

Thursday, May 3, 2018

Week in the Life 2017

So i had the best of intentions to get my Week in the Life done last year "real time"...I did the project on Becky Higgin's Project Life app.  I used the Currently Edition designed by Peppermint Grandberg (One Little Bird) and overlays from Just Add color (also in the app).  I really had the best of intentions and even had a number of layouts done..but it was that final part of finishing that took me almost a year.  This year I vow to do better!! I will still use the Project Life app - but now with FFT (Free Form text) I am sure it will be SO MUCH easier.....

If you haven't heard yet about this new option, take a look at Becky's blog here and join her Facebook group here.  I was able to use some great freebie dates that Mommyish shared to her newsletter readers as well.  Plus there are a few digital items from various Ali Edwards kits - since of course she is the driving force behind this awesome documenting..  She has had some great posts getting everyone ready for this year's Week in the Life which is this week coming up - May 7th through 13th.

I have Ali's digital cards from 2016's kit as well a whole years worth of Storyteller digital kits that are calling my name...I feel confident that I have plenty of supplies but I definitely need to work on my timeliness....  keep an eye out for more regular posts here on the blog, including my 2017 December Daily which I finished a few weeks ago and finally got a chance to photograph...

So without further adieu - enjoy the picture heavy post!

Cover

 Monday

Tuesday


Wednesday - girls night out!


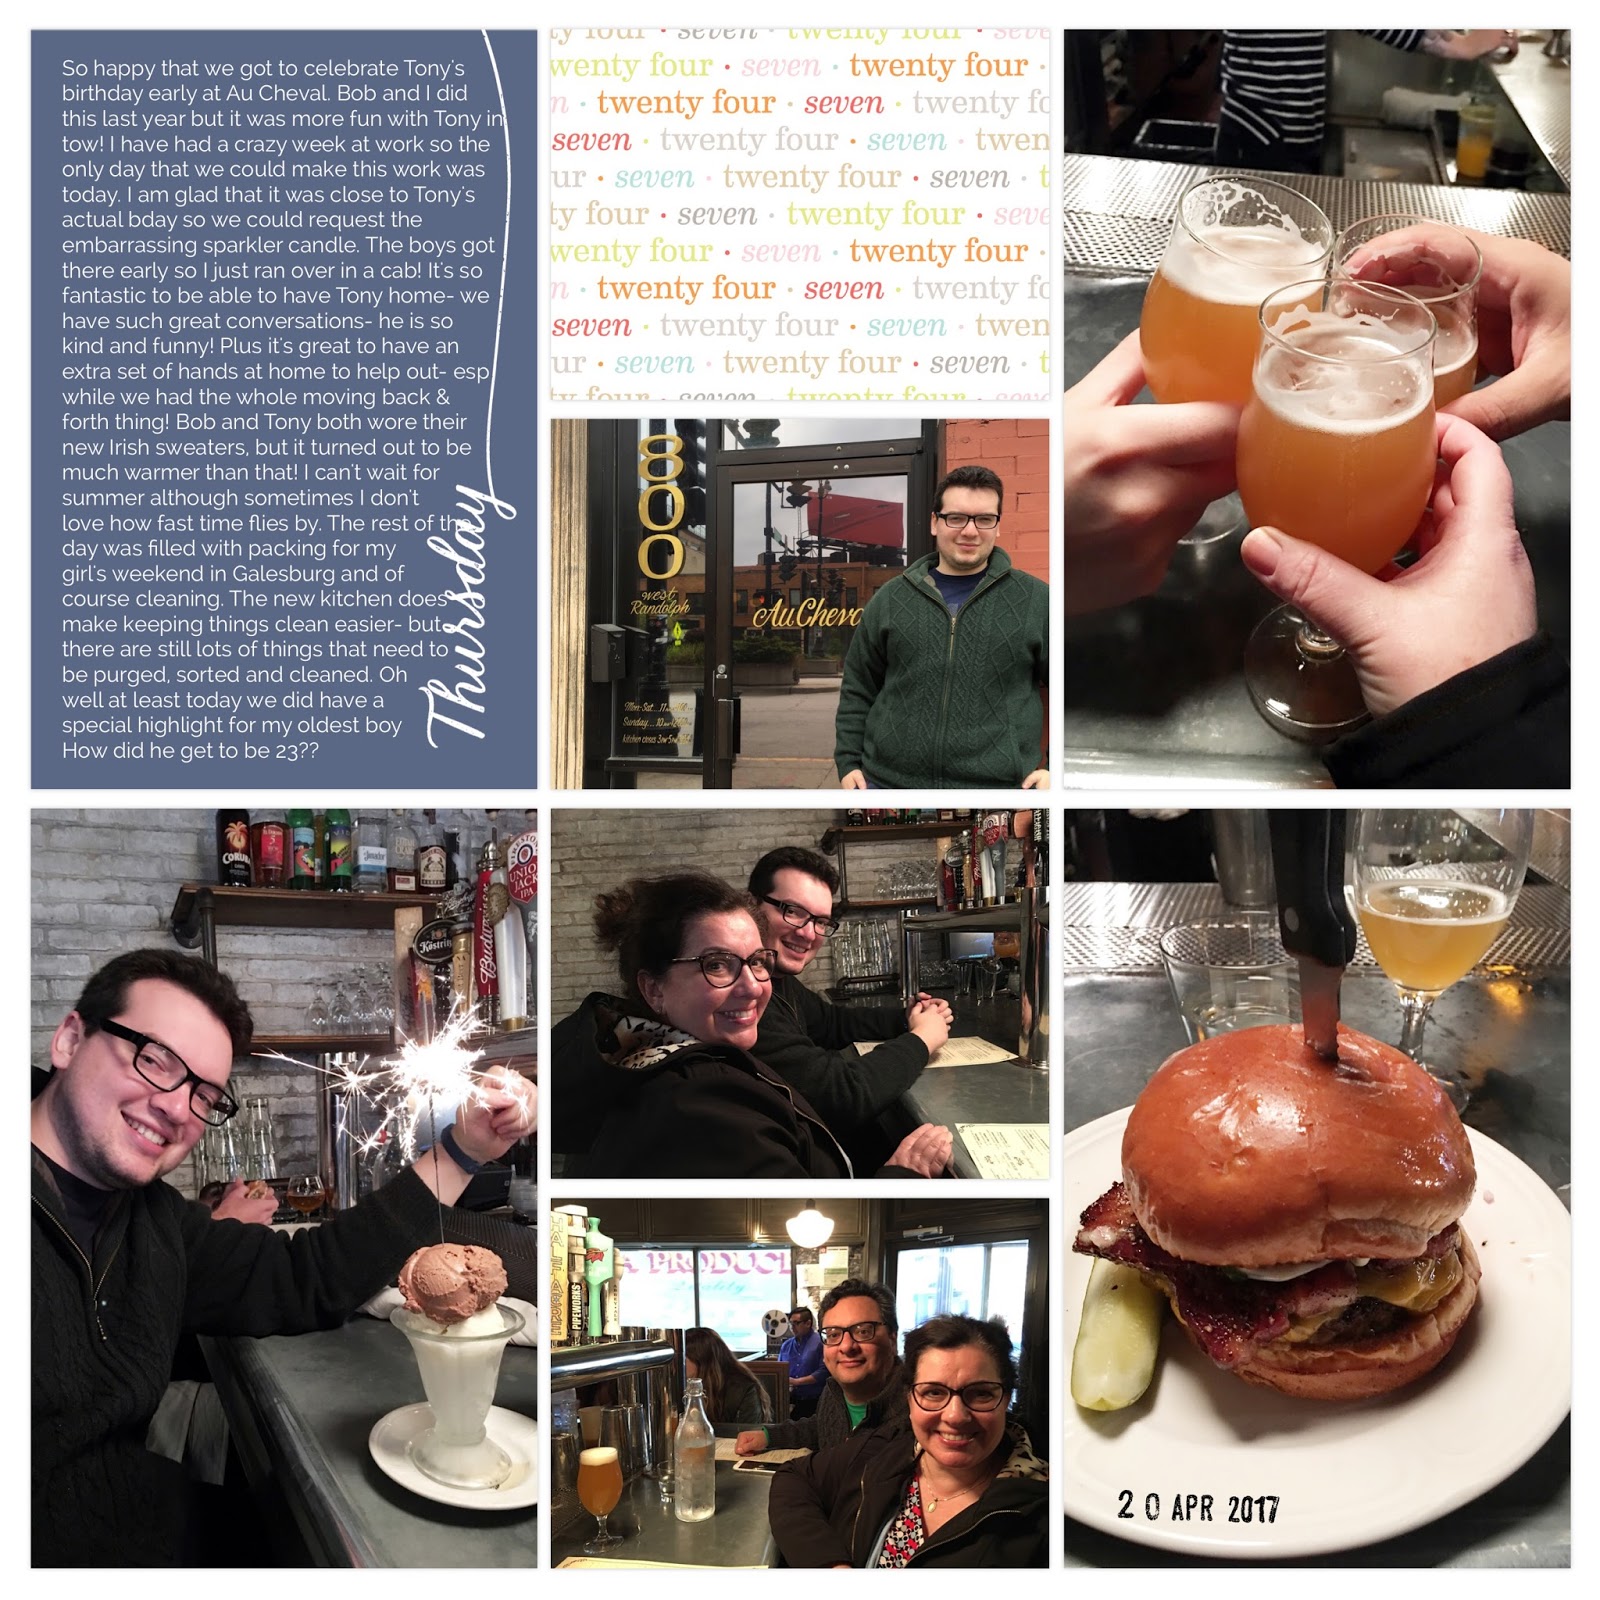
Thursday - celebrating my son's bday early


Friday - headed out of town for a real girl's weekend!


Saturday's festivities with the gals


Sunday - headed back home on the train - it's good to be home!


Closing page of my album


Hope you enjoyed my project.  I am excited to follow along again this year - and while my documenting may not be perfect its certainly something that my family will enjoy in the years to come!  Thanks for sticking with me!


Sunday, July 16, 2017

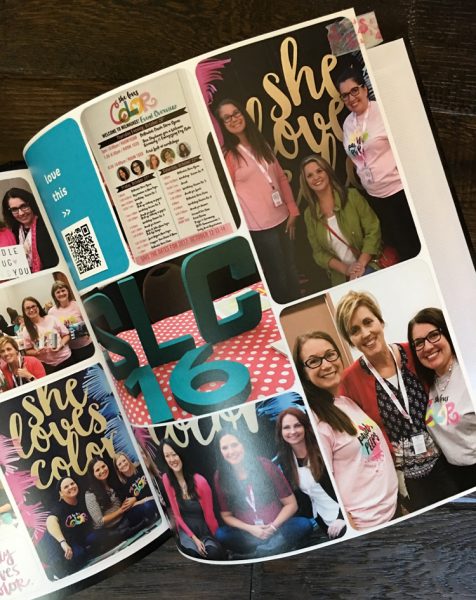
Photobook tips and tricks

Earlier this week, I posted on Amber LaBau's blog about some tips and tricks for printing photobooks. One of the things that I miss when I made the switch to digital scrapbooking in 2014 was the ability to have pages done "in real time"... or at least in chunks like I had been doing with my Project Life albums in 2012 and 2013.  My family loved to look at these books and flip through all the photos and relive the memories that they represented.  I was able to keep up pretty well during those 2 years and I loved it.  Part of the reasons I moved to digital was the ability to scrap traveling or commuting so that I could scrap current memories.  Plus with photos in digital format it was 1 less step to take to take in my process.  So let me talk about my evolution of getting my digital creations from my computer to a physical version that my family and friends can enjoy.


Here is my 2nd half of 2014 12x12 album (p.s. - this is a Becky Higgins Project Life album and is still available at Michael's  - make sure to use a coupon!) I was able to fit Jan-August in the first album and this album holds Sept- December including our 13 day trip to Spain...


Now I don't often have such a fabulous trip to add to my yearly album ( I wish... right??) but I couldn't jam the whole year into 1 album so this was my compromise.  I can still print these into a separate photo book later on if I want - but more on that later.


A 2 page spread from our trip to Spain using The Lilypad's Memory Pockets Monthly products
In 2015, I decided to move to printed 10 x 10 photobooks in lieu of printed 12x12 individual pages slipped into page protectors.  I saw how hard it was for my older relatives to look at those big and heavy books - plus I still had so many scrapbooks I wanted to complete (both older and future stories) that I could not imagine where I could store all those albums - you see I already have about 40 12x12 albums in IKEA Billy shelves (similar to the current Kallax - they don't make this size of the Billy anymore :-( ... and I easily have 20+ albums I wanted to create of older stories, heritage, vacations etc that I had rolling around in my head plus 2 albums per year for Project Life adds up quick!


Using Amber LaBau's Project Life 2016 Edition for my cover


See how thin this 50+ page 10x10 book is!
I save all my pages to my normal storage places first, see this post on Amber's blog regarding the importance of backup.   Next step in my process is to upload to my preferred photo book provider.  I have used Shutterfly to date on all my books and I have been fairly happy with the results.  I know there are other options out there - including printing from the Becky Higgins Project Life app, Adoramapix, Mixbook and Picaboo. They have all have different page limits, costs and quality issues that you need to account for.  But there are some tips I have learned along the way printing my photobooks/scrapbooks that I will share to make your process that much smoother. Plus I have come up with a few ways to incorporate some fun "paper" elements into my printed photobooks as well.


Using Amber's Project 2016 Project Life Collection
I have used actions in the past to help create consistent borders to avoid bleed issues when printing out my books. Studio Wendy has some great actions to create bleed for 10 x 10 books specifically for Shutterfly.  She has some great options for other sizes and printers as well.  But what if you don't want to use an action - what are your options?


Page on right doesn't use an bleed action - and the borders are inconsistent. I am ok with this sometimes, but other times not.


A page with a "solid" background can often hide the bleed issues more easily


Trying the lay flat option on my most recent photo books - almost identical height and depth only slightly wider


Binder is just a bit wider to include this extra portion to make it lay flat
Below is the comparison of the lay flat versus non lay flat.  Lay flat does help with the bleed of the center, but does not necessarily adjust for borders on top, bottom or sides.  There are several printers that offer lay flat options - but generally they are more expensive than standard binding  - sometimes much more expensive.  This expense might not be worth it for you - or may only be worth it for special event books - printing can be a very personal decision based on your budget and goals/objectives.
One tip I have for everyone regardless of your preferred printer is to assemble the book as you go - that is, don't wait until you have every page done until you start uploading into their book making tool.  Most places have special sales which can lower the cost of your photobook.  In some cases you can save 40%-60% during a sale  - but you often don't have a lot of warning.  If you are close to finishing a project it might be worth putting in a big push to take advantage of a sale - but it's a lot easier when the book is almost assembled
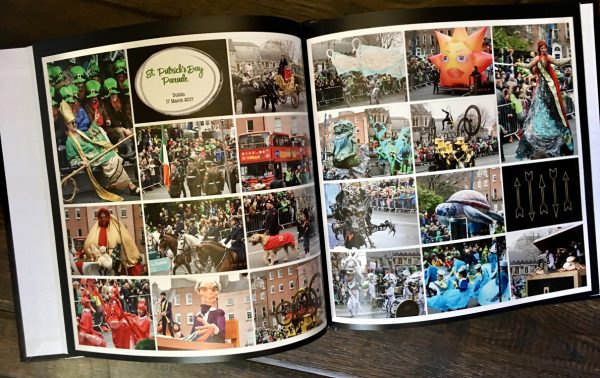


Non lay flat
The way I am currently dealing with bleed issues is to adjust all the pages after they are placed in my "draft" Shutterfly book.  If you go into "Advanced Editing" you can adjust 1 page to 95% or 90% and have this adjustment applied to EVERY page in your album.  I don't mind the black border around every page and it resolves the bleed issue on every page. Other photobook printers have similar tools which can be used to help create a consistent border.  Now this book above and below is a special book I did for my son's Marching Band trip to Ireland.  My hubby and I went as well - but did some different activities along with some of the same.  I created 2 photobooks - with about 1/3 of the pages the same and 2/3 different.
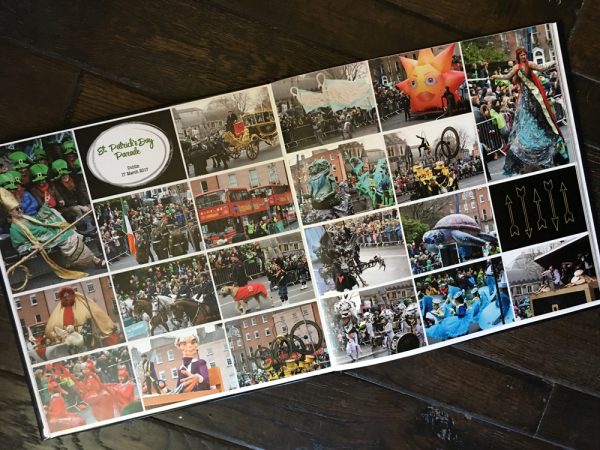


Lay flat option - excellent at the center but can still cut off top, bottom or sides.
Finally, I have used both washi tape and some label holders to help create dividers within my photobooks for interest or to highlight a special section.  You can do this by using a 6x8 template or even a large single 6x12 template.


Using some cute washi to highlight an important section of my photobook


Here using an 8x10 template - with an Avery self stick label. I still upload the full page and then trim with a paper trimmer after it arrives

Hope this gives you the confidence and motivation to go out and get your pages printed in photobooks or even in single pages - whatever form you decide.  The most important thing you can do is to get your pages out of the cloud and into a physical form where everyone can see your beautiful work and share your memories.
As always if you have any questions - or there are other things you would like me to share about my process - please let me know.

Monday, March 27, 2017

Beyond the basics for App Scrapping


On Amber LaBau's blog today I give a few beyond the basics tips for scrapbooking on the go. For as much as I love digi scrapping - sometimes life gets in the way and I do not get all the time I want in front of my computer screen. However I always have my cellphone with me and I find that I can get a lot prepped and finish up layouts when I do actually have time to get in front of my PC. First and foremost - the best way I have found to be able to transfer and use photos between devices is to use Dropbox. Dropbox is a cloud based document storage platform - and you can sync between multiple devices automatically.  

I also use as 1 of my cloud storage systems for my phone photos - its automatic and reliable. Photos are copied to a folder on my PC and then I can organize from there. I do pay for extended time for my deleted photos (1 year versus 1 month - and yes I have had to use it!) as well as extra storage since I save all of my current kits in Dropbox for ease of use. I currently have 1TB of storage. Dropbox is available on iOS and Android.


The next most important tool in my arsenal is Becky Higgins Project Life app. This app is also available on iOS and Android.  Although there are other similar programs ( Rhonna Designs and many collage apps which are also excellent..) - the ease of using of this app has changed my on the go scrapping in so many ways! Introduced in fall of 2014 there have been many improvements over the last 2.5 years.  Many weeks I only take pictures on my phone so having the app is an excellent way of keeping up with documenting my year.  There are many kits built into the app - but even better is that by using Dropbox you can use cards from any kit - especially adorable ones like Amber's! There are lots of tutorials on Becky's website and YouTube that can help you get started if you are not familiar with the app. There are many different templates available  - you can even use very large photos.
You can export to print individual pages or into photobooks.
The next tool in my arsenal of beyond basic apps is Pic-Tap-Go.  There are many great basic photo editing apps built in all phones (and they get better with every version) but I like have the ability to have multiple layers of editing available.  Although this is only available in iOS - a very comparable product for Android users is Snapseed. There are many, many photo editing options available but I have found these to both be very consistent - and they also leave your original uneditted version in your camera roll in case you want to use it in a different way - for example using a color version and black & white version of the same photo on separate layouts - or even the same layout.
One of the only drawbacks if you want to add some artisitic touches is that you cannot add all the extra embellishments in Project Life etc.  That is where Over comes in.  It allows you to add text over your images, add png's - even mat your layout with a piece of patterned paper. Over is developed in part by Adobe (the makers of Photoshop an Photoshop Elements) so they understand the digi scrappers workflow better than most.
In this app you can upload fonts, add .png's and word art that is built into the app. You can also add dropshadows (and control what they look like) on elements that you import in the app.
Over is available for iOS and Android.
Now for the fun part - let me share some examples of beyond the basics in app scrapping.
First step is selecting which photos I wanted to use and what kit to use – everyone has their own method for selecting kits to go with their photos.  I tend to use colors or themes as my primary selection method – some people use a kit for a month or year so it all depends…
In this case I am happily scrapping my photos from my Ireland trip!  I just got back last week so all the memories are fresh and I am excited to be documenting them quickly!  That is the best part of using apps – is that you can even scrap on the go – in the car/bus/plane etc. while the memories are still so vivid!
I use the Becky Higgins Project Life app and select a basic template that I wanted to use – don’t worry you can change it as go – which in this case I did.  I knew I wanted to work with my photos from Trinity College and the library where the Book of Kells is located – it was amazing! I looked around to see which kit I wanted to use.  I ended up selecting Amber’s Composition Pocket Squares and some of the elements from the Memory Pockets Monthly: Composition kit from September 2016.  I was a long time subscriber – and while I was looking at all the great elements/papers etc. from the kits I may have to subscribe again…
    
In the app, you pick a pocket and insert either a photo or a card.  In the case of using a kit outside of the app, you will insert as a photo. There are lots of options in which file to select your photo from –not only your Camera Roll or Dropbox – but from several other apps including PicScanner, PicStitch, Pic-Tap-Go and lots of social media platforms – and it seems like new ones get added all the time. Then start adding different cards and photos and see what works for your page design.. In this case I went through a few different layouts until I liked where I was.
Within the app you can also edit photos – in case you hadn’t already edited the photos. There are basic edits as well as access to full Pic-Tap-Go editing tools. Now that my photos and cards are where I want  - I can add the other embellishments.

Completed within the app - ready for printing as is, or for additional embellishments
After you are done – you have many options to export your “completed” albums. Since I wanted to add extra embellishments I imported it to Over.
In Over I was able to add embellishments – move and resize and also add shadows! There are even options to do limited recoloring within the app. You can also add text to your photos, recolor, move and shadow. Again there is an option to add your own fonts.  This is a way to add journaling  on your cards that are not native to the app.  It is not a perfect solution, so if I have a lot of journaling I want to do – I usually import into Photoshop Elements (I’m in PSE11) which allows for the most control over journaling size and spacing. However being to get 95% or 98% of my layout done on the go is worth the extra few minutes it might take on a few layouts…

Added text and elements with shadows
Saved back to Dropbox for printing!

There you have it – from start to finish using some of the beyond the basic apps.  I hope you enjoyed this tutorial – please let me know if you have any specific questions or want me to go more in depth on one aspect.