Wednesday, November 1, 2017

School Album - Part 3: Creating Layouts

This post was first publish over at Amber LaBau Designs, here.

www.paintedladiesjournal.com | School Albums

Today, I'm sharing the next part of my School Albums Series. Previous posts were about  Organizing and Photographing Artwork (Part 1), and Making a Plan (Part 2). "Making a Plan" showcased my first two layouts which I plan to repeat for every school year. I recently spent some more time photographing artwork and other items from my daughter's 2nd Grade year (last year) and I'm back to show you what I'm doing with that.

www.paintedladiesjournal.com | School Albums


I feel that if you are behind (like me), it is good to start with the current year and work backward. So, I'm working on DD's last school year in second grade. It was freeing to be able to recycle that pile of papers after getting it all photographed. (I did keep 3 pieces of artwork that I plan to frame for myself and also use to create holiday gifts for family!)

www.paintedladiesjournal.com | School Albums

I chose to put photos in among the artwork and paperwork samples. I quickly went through my 2017-18 archives for the school year months to select the highlights related to school and extra-curricular activities. They are sprinkled chronologically with artwork that went with the season, but it wasn't a strict guideline.

www.paintedladiesjournal.com | School Albums

I wanted to include a lot of artwork, but also some of her writing. I plan to include a birthday picture, each year, like the one above with her number 8 candle. I really liked finding writing and artwork that described her second grade self. There was even one written by a classmate.

www.paintedladiesjournal.com | School Albums
Finally, saving all these pieces of school work is paying off! I love how the artwork combined with the photos has turned out. Coming soon, more pages for Second Grade that include pieces I want to include as originals.

Holly Genc


Monday, July 31, 2017

School Albums - Part 2: Making a Plan

I'm back with my next step in getting School Albums started. If you are anything like me, you have stacks of school memorabilia in bags or boxes in your closet and just need a system for starting! I did the first post on organizing and photographing artwork in June. Find it here.
Holly | www.paintedladiesjournal.com

Now, we get to the fun part, making a plan for all this stuff. I really like the idea of creating a design that includes everything I want to see in a school year and then repeating it, each year. Today's post included the first page, front and back. I chose to use pocket-style pages. They will be mostly hybrid, but some may be full 12x12 prints of layouts, as well. This all stemmed around the fact that I had been buying an 8x10 school picture and 8x10 class picture each year starting in pre-kindergarten. I really wanted to stick with 12x12 page layouts, and not add in an 8x10 insert for those. I wanted them to be part of the pocket page layouts.

Holly | www.paintedladiesjournal.com

Enter Stage Right: The Fuse Tool. I kept thinking about it and would it be worth it, creating custom pocket pages to make my idea work? I loved the idea too much not to try it. I played around in Photoshop Elements to see what kind of two-sided pocket page would work well and then got to it.
Holly | www.paintedladiesjournal.com

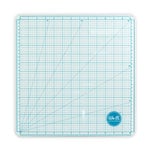
I watched some Youtube videos to get some tips for my first trial with the Fuse. I decided to also invest in the glass cutting mat and a longer metal ruler since I would be working with full 12x12 protectors. (Note: I bought a 12" ruler, but I suggest getting a 15" ruler) I inserted an 8x10 photo into the protector and positioned it where I wanted it, then fused a pocket around it. From there, I continued to complete my pocket page design. (HINT: When printing your other cards, measure the pocket and adjust your card size)


Holly | www.paintedladiesjournal.com

This two-sided page will be my first page each year. Here is the front. It has the 8x10 portrait school photo. I made a little title card to go in the bottom skinny pocket that showcases the grade and teacher's name.

Holly | www.paintedladiesjournal.com


I used a "Wonderful You" paper for a background to put the 2nd Grade title on, which is from "Through the Years." The teacher's name is spelled out with the "Blackboard Alpha". I chose to make a 4x6 card with photos of her two main teachers this school year in the upper pocket, again using "Wonderful You" paper and elements.

Holly | www.paintedladiesjournal.com
The bottom, right pocket is a "Wonderful You" pocket card that had lots of fun info to fill in about the school year.

Holly | www.paintedladiesjournal.com


I had to make a decision to be ok with the back page being read sideways. This type of thing typically bugs me, but I loved the custom pocket page idea so much that I got past this. So, the landscape class photo backs up to the school photo and here, I put in a "first day of school" picture, along with another card from "Wonderful You" that I will have Audrey fill out (now, because she just finished this grade!).

I'm pleased with this set up and plan to repeat it for each year for each child. Hope this gave you some ideas! I will be back soon with more progress on this album set-up. We have to do something with all those photos of school memorabilia that we took.

Here are a few affiliate shopping links to the items I have used in this project. Affiliate links do not cost the buyer anything more and send a few cents to the blog. Thanks!


We R Memory Keepers - Precision Glass Cutting Mat

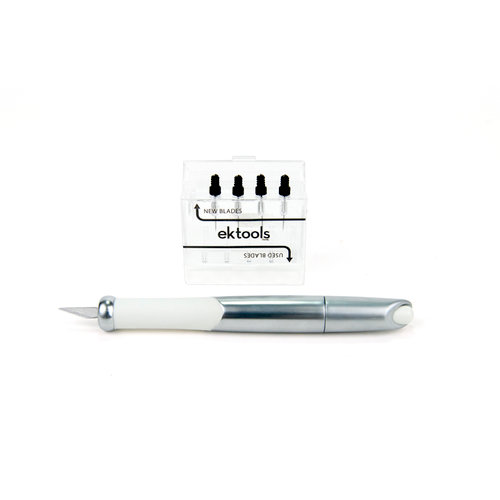
EK Success - EK Tools - Retractable Knife and Blades

 
15" Metal Ruler (click on picture above)


12x12 3-ring Page Protectors

Monday, July 17, 2017

Setting Yourself Up For a Great Traveler's Notebook

This post is over at the Amber LaBau Designs Blog, here. In this post, I've added a few shopping links incase you see something you have to have! Some are affiliate links. Thanks in advance for your support of our blog.

Holly | www.paintedladiesjournal.com
This is my second Traveler's Notebook that I have put together during/after a family vacation. I took a few "lessons learned" from the first one (which you can find here and here, if you'd like a peak) and incorporated them this time around.

Holly | www.paintedladiesjournal.com

My favorite TN (Traveler's Notebook) Tip that I also used in my first book is the Summary Page. At the beginning of the book, I jot down a few key memories for each day. This book is brought with you for your trip. Do this each evening, before the jam-packed days run into each other in your memory. (of course pictures help, too).

Holly | www.paintedladiesjournal.com
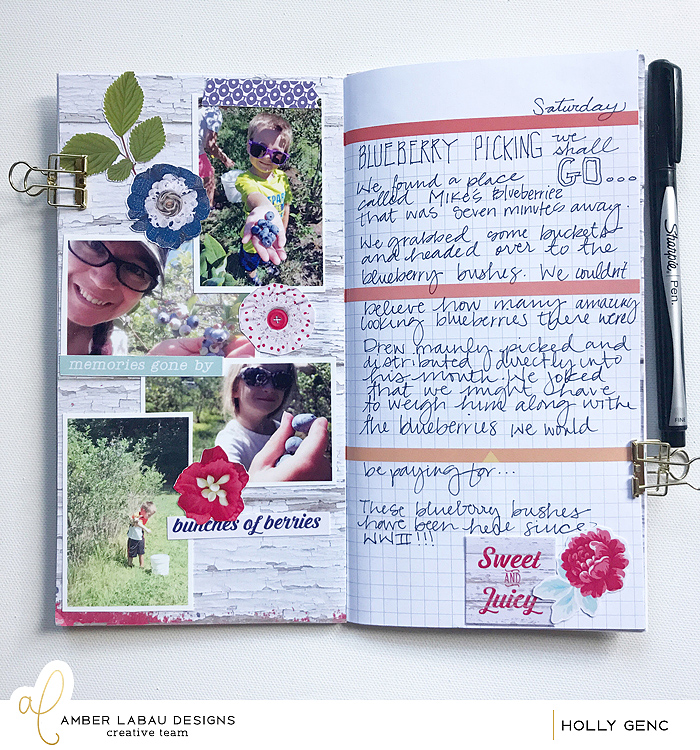
Like my last TN, during my trip, I wrote some journaling of memories I wanted to document. The difference this time around was that I left more space for photos. My first book had all the journaling at the front of the book. That works, too, but I wanted to try spacing it out to add the photos that go with the stories right where they belong.

This trip was last summer, and although ideally this project would be done now, the beauty is that all the journalling already is! I just have to print the photos I want and add them in. I like to add some embellishments, too. Amber LaBau Designs has a great kit called Sun-Kissed that is perfect for all those berry picking outings! I printed mostly blueberry themed items, but it works for all kinds of berry picking. I used my Silhouette to print and cut. I also used PicStitch to create collages of my photos that I could cut apart for my TN pages.

Holly | www.paintedladiesjournal.com


Here are the completed pages that match the previous "before image" of these pages. I chose to print a paper from the Sun-Kissed Kit for my background. I just glued that right onto the left hand side page. 

Holly | www.paintedladiesjournal.com

Here's the next two page spread before I did my crafting. It's beautiful as is, but I wanted to keep with the Sun-Kissed Theme and so I glued down more papers from the kit. This is a Cocoa Daisy Traveler's Notebook that I'm using. If you want plain pages, or know you will paste in lots of your own papers, I like midori brand blank insert refills.  Here is a great Traveler's Notebook Bundle.

Holly | www.paintedladiesjournal.com


And here's the final layout! I printed the pages as 8.5x11 on my Canon PIXMA. I was planning to print those on cardstock, but they printed well on plain paper and from prior experience, I decided I'd like this book to not get too thick. My last book was soooo thick due to lots of cardstock being added. The elements and coordinating Sunkissed Washi Tapes are all printed on cardstock (Canon Matte Photo Paper).

-Holly


Sunday, July 16, 2017

Photobook tips and tricks

Earlier this week, I posted on Amber LaBau's blog about some tips and tricks for printing photobooks. One of the things that I miss when I made the switch to digital scrapbooking in 2014 was the ability to have pages done "in real time"... or at least in chunks like I had been doing with my Project Life albums in 2012 and 2013.  My family loved to look at these books and flip through all the photos and relive the memories that they represented.  I was able to keep up pretty well during those 2 years and I loved it.  Part of the reasons I moved to digital was the ability to scrap traveling or commuting so that I could scrap current memories.  Plus with photos in digital format it was 1 less step to take to take in my process.  So let me talk about my evolution of getting my digital creations from my computer to a physical version that my family and friends can enjoy.


Here is my 2nd half of 2014 12x12 album (p.s. - this is a Becky Higgins Project Life album and is still available at Michael's  - make sure to use a coupon!) I was able to fit Jan-August in the first album and this album holds Sept- December including our 13 day trip to Spain...


Now I don't often have such a fabulous trip to add to my yearly album ( I wish... right??) but I couldn't jam the whole year into 1 album so this was my compromise.  I can still print these into a separate photo book later on if I want - but more on that later.


A 2 page spread from our trip to Spain using The Lilypad's Memory Pockets Monthly products
In 2015, I decided to move to printed 10 x 10 photobooks in lieu of printed 12x12 individual pages slipped into page protectors.  I saw how hard it was for my older relatives to look at those big and heavy books - plus I still had so many scrapbooks I wanted to complete (both older and future stories) that I could not imagine where I could store all those albums - you see I already have about 40 12x12 albums in IKEA Billy shelves (similar to the current Kallax - they don't make this size of the Billy anymore :-( ... and I easily have 20+ albums I wanted to create of older stories, heritage, vacations etc that I had rolling around in my head plus 2 albums per year for Project Life adds up quick!


Using Amber LaBau's Project Life 2016 Edition for my cover


See how thin this 50+ page 10x10 book is!
I save all my pages to my normal storage places first, see this post on Amber's blog regarding the importance of backup.   Next step in my process is to upload to my preferred photo book provider.  I have used Shutterfly to date on all my books and I have been fairly happy with the results.  I know there are other options out there - including printing from the Becky Higgins Project Life app, Adoramapix, Mixbook and Picaboo. They have all have different page limits, costs and quality issues that you need to account for.  But there are some tips I have learned along the way printing my photobooks/scrapbooks that I will share to make your process that much smoother. Plus I have come up with a few ways to incorporate some fun "paper" elements into my printed photobooks as well.


Using Amber's Project 2016 Project Life Collection
I have used actions in the past to help create consistent borders to avoid bleed issues when printing out my books. Studio Wendy has some great actions to create bleed for 10 x 10 books specifically for Shutterfly.  She has some great options for other sizes and printers as well.  But what if you don't want to use an action - what are your options?


Page on right doesn't use an bleed action - and the borders are inconsistent. I am ok with this sometimes, but other times not.


A page with a "solid" background can often hide the bleed issues more easily


Trying the lay flat option on my most recent photo books - almost identical height and depth only slightly wider


Binder is just a bit wider to include this extra portion to make it lay flat
Below is the comparison of the lay flat versus non lay flat.  Lay flat does help with the bleed of the center, but does not necessarily adjust for borders on top, bottom or sides.  There are several printers that offer lay flat options - but generally they are more expensive than standard binding  - sometimes much more expensive.  This expense might not be worth it for you - or may only be worth it for special event books - printing can be a very personal decision based on your budget and goals/objectives.
One tip I have for everyone regardless of your preferred printer is to assemble the book as you go - that is, don't wait until you have every page done until you start uploading into their book making tool.  Most places have special sales which can lower the cost of your photobook.  In some cases you can save 40%-60% during a sale  - but you often don't have a lot of warning.  If you are close to finishing a project it might be worth putting in a big push to take advantage of a sale - but it's a lot easier when the book is almost assembled


Non lay flat
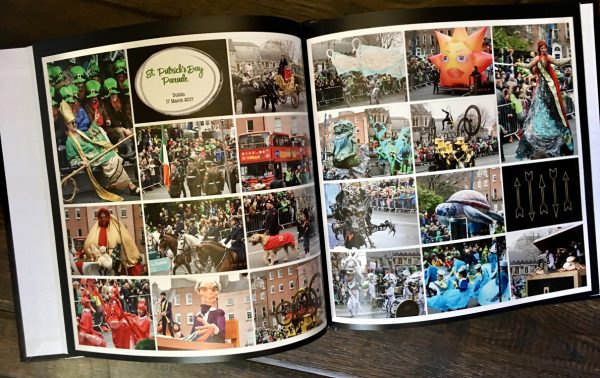
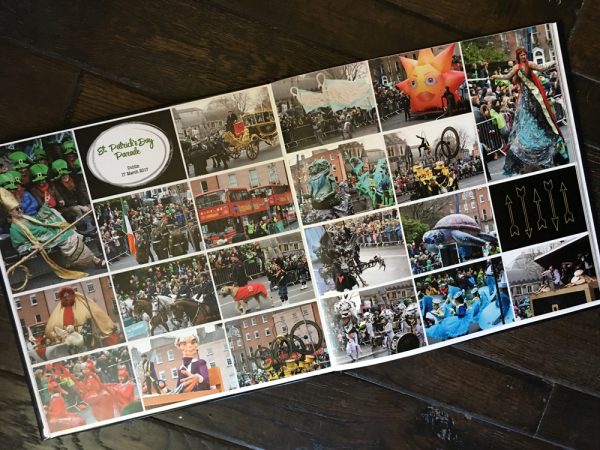
The way I am currently dealing with bleed issues is to adjust all the pages after they are placed in my "draft" Shutterfly book.  If you go into "Advanced Editing" you can adjust 1 page to 95% or 90% and have this adjustment applied to EVERY page in your album.  I don't mind the black border around every page and it resolves the bleed issue on every page. Other photobook printers have similar tools which can be used to help create a consistent border.  Now this book above and below is a special book I did for my son's Marching Band trip to Ireland.  My hubby and I went as well - but did some different activities along with some of the same.  I created 2 photobooks - with about 1/3 of the pages the same and 2/3 different.


Lay flat option - excellent at the center but can still cut off top, bottom or sides.
Finally, I have used both washi tape and some label holders to help create dividers within my photobooks for interest or to highlight a special section.  You can do this by using a 6x8 template or even a large single 6x12 template.


Using some cute washi to highlight an important section of my photobook


Here using an 8x10 template - with an Avery self stick label. I still upload the full page and then trim with a paper trimmer after it arrives

Hope this gives you the confidence and motivation to go out and get your pages printed in photobooks or even in single pages - whatever form you decide.  The most important thing you can do is to get your pages out of the cloud and into a physical form where everyone can see your beautiful work and share your memories.
As always if you have any questions - or there are other things you would like me to share about my process - please let me know.


Friday, June 30, 2017

The Importance of Backup!!

Up on Amber's blog today is my recommendations for the incredibly important but oh so boring computer backup tasks and some recommendations. Now that school is out and the temps are warm your mind tends to be filled with all the summer fun bucket list items that you want to check off!  Time at the pool, ice cream cones, vacations, hiking in the woods, bar-b-ques and long walks all seem more important than that dreaded activity...backing up your computer!  I would argue that summertime is actually the best time to take on this dreaded task.

From the beginning of my scrapping journey - I have been paranoid about losing my photos. I have been lucky that I haven't actually lost photos but I have come very close a few times... in ways that don’t have anything to do with hardware failures (like external hard drives or desktops) although I have had that happen as well!
We have so many photos that we take everyday - at least I do! For example, on a recent girls weekend I took well over 250 photos. Not that I recommend that you keep all those really bad photos - way too dark or very blurry. But you need to be able to save the ones you want to keep safe and secure so that you can access them to scrap with. I don't know about you - but even though I do keep up pretty well with current "project life" type scrapping, I have lots of older projects and big vacations that still need to be documented.
The best recommendations that I’ve seen are to maintain at least 2-3 copies of every element and that at least one of those copies should be in the cloud. Right now I have photos and supplies on my computer’s hard drive (although almost maxed out on space there), 1 external hard drive (EHD) and several cloud systems – Dropbox, Backblaze, Google Photos and some big trips also backed up on Flickr. Plus, since I have doing digital pages beginning in 2014 – those are all uploaded to Shutterfly and Persnickety Prints – although those are not true backups… Some of these systems are newer to my process and some I have been using for a long time so let me explain about a few of them.
My biggest challenge is keeping this all organized though. In my mind I would love to have everything beautifully organized but that is just not a reality for me at this point in my life. Hopefully one day the organization can occur - but until then I want to be able to find things at least by using the search functions.
My longest used system - and the one I feel most comfortable utilizing is Dropbox.  Dropbox can automatically backup your phone photos and syncs your files across your devices (PCs, iPads, Tablets etc.) - you can selectively sync your files even if you are short on space on one device over another.  I love the ability to share the files or entire folders with anyone in my family of friends.
However a word of warning for sharing - this is where I almost lost all of my trip pictures to Arizona from 2015...thanks to sharing a folder with my mother. You see you have the option to have Editing or Viewing capabilities with whoever you share with - this is true of many other cloud based services as well.  Make sure you don't give folks Viewing options unless they know what they are doing.... I almost lost 350 family photos (plus almost 6-8 hours of editing) when my mom ran out of space in her free Dropbox account! Luckily I caught it on the 30th day - where you can still recover files, and now I pay for the 1 year archive option (instead of the default 30 day option) in addition to the 1 TB of storage.
Another great based cloud system that I have found recently is Google Photos - also available for PC, iOS and MAC products, and Android based products. This tool also allows for easy photo sharing and the creation of separate albums - however since this has the power of Google behind it - you can easily search by person's name or location too!  It has smart logic and algorithms that get smarter the longer and more you use the tool.  I have found pictures of my children at a young age that I didn't even know I had scanned. There is a great free class available at Modern Photo Solutions that teaches you about all the advantages to this tool.
Now I know that I have shared primarily photo and digi supply storage solutions so far (which also work on your phone - either Android, Windows or Apple) I also wanted to share that I use Backblaze for backing up my Desktop at home.  Here I back up all of my files in addition to all of my photos and digital products. There are several products out there that do the same thing - In fact I had previously used Carbonite for this same reason.  But there are a few important reasons why I made the switch.  First of all - Backblaze is a little cheaper - yay for more money for digi supplies!! The time it took to back up my whole computer initially was not too long and most importantly - they offer the option to ship you an external hard drive with your complete backup on it for $149 which is refundable when you return the EHD.  That alone was worth the switch as I have had several computer failures which required me to reinstall EVERYTHING on my computer!
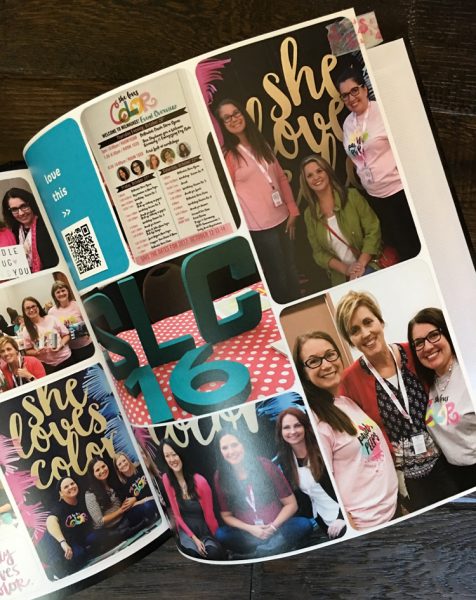
One drawback that I have noticed, at least between Carbonite and Backblaze, is the ability to search your backup and selectively restore files (or use them for digi scrapping in my case).  With Carbonite - I was able to see thumbnails of my backed up files and selectively restore - say those 2011 Disney pictures.  With Backblaze, there are no thumbnails and selectively downloading is much more difficult.  While it was a nice option for Carbonite - overall Backblaze has better options for full restoration.
Finally a note on External Hard Drives - I currently use a 5 TB Seagate EHD (gotta love Costco!) The standard software that is included with the EHD is all that I use.  There may be a better way - but that research is on my to do list this summer. And here is the advantage of having all my photos in one space - I am able to quickly and easily find older pictures - like these of my husband's graduation from his Master's degree from 2005.

I hope this helps you get started with taking this on as your "summer" project. If you have any other questions - please let me know and I'd be happy to help out any way I can.