If you are a kit subscriber, I have a few tips to share that work for me.
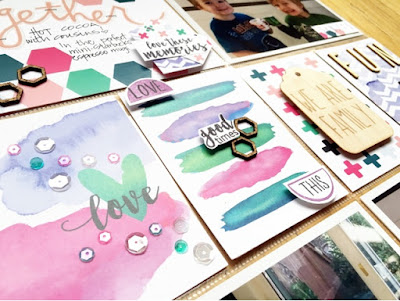
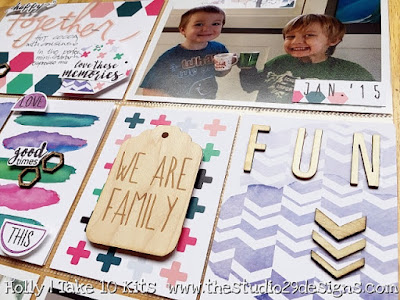
TIP 1: When I get my new kit, I look through the cards and "loosely" group together the cards I want to use for each layout I will do. I think this helps to make sure I use them all. So, for my first February kit layout you can see I picked those watercolor cards and then coordinated colors with the other card selections.
Those stamps this month are just fabulous. Did you pick up the extra one? I love the brush font and versatile everyday sentiments. Get it here.
TIP 2: It is great to use up that kit now vs. picking and choosing from all your kits you may have hoarded. Kits are designed for the current months, but you can use them for that month from last year, if you work like me. So, all those "left overs" from past kits should now be divided up into your regular supply organization. You will more likely see it and use it.
TIP 3: Get out your stamping tools and a some white cardstock. I tend to stamp on cardstock and cut it out so that I don't mess up my one-of-a-kind kit cards. Unless you are going for a messy look...which is fun, too. Regardless, the point is, stamp a bunch of stuff now with your supplies out and you can use them with all your layouts using this kit.
I had a lot of filler cards in this layout. I like to add dimension to break it up a bit and give it more interest. I added the wood veneer tag with a few pop dots to that "plus" pattern card. I had some chevron wood veneers and letters to highlight that purple patterned card.
See the label on that top photo? I did exactly what I say I don't typically do, and stamped on the cut-apart! Rebel. The alpha stamp in this kit is very cute and designed to easily line up the letters so you can space them nicely and keep them in a straight line. They are great!
To summarize my subscriber tips:
1. Group cards together for each layout (but not set in stone)
2. Keep using your kit now (don't hoard them).
3. Stamp a bunch of items at the same time on cardstock to use for all your kit layouts.
Go out and "kill those kits"!
Thank you!
Holly with www.paintedladiesjournal.com
(Hop over to my blog post for an extra supply list)
Follow me on Instagram.
Of coarse the kits themselves are linked at the top of the post (the shop link).
Scotch Quick-Dry Adhesive (great for small/skinny items)
Glossy Accents is another great product to use for adhering small items. It is also fun to use on top of products to add a little gloss to a die cut or stamped image, for example.
Tombow are my favorite tape runners
Tonic Spring-Cut Detail Scissors. These are great and they are purple! I have two pairs.
Alphabet and Numbers Wood Veneers (I used to spell FUN in my layout)
VersaMagic Chalk Ink (it stamps much lighter than this)
My Go To Black Ink
My Miny Attacher is used almost always. Love it.
Sharpie Pens are archival safe. This set is great for journaling and planners.
Here are some Heidi Swapp Acetate Words. I couldn't find the set with the word "Together" that I used, but these are similar and very fun. "Today" is in the same peach color that worked so well with these cards.
Today's photos were printed by Persnickety Prints (can't recommend them enough, and I'm not an affiliate for them) but I do print a lot at home, too, using this printer and paper


