
I'm knee deep into my first December Daily project! With what turned out to be a super busy week (that's probably lots of us!), my original plan to show a bunch of completed pages got squashed. But, I'm so excited to share a little on my process! I love these kind of blog posts.

So, if you follow me, you saw a post a couple weeks ago on my December Daily Prep and ideas on what to set up ahead of time for this type of album. Go here, if you'd like to see that!

As our days of December are flying by, I've been taking a few steps to keep on track. With littles under foot, I just can't have my stuff sitting out all the time!

The most important thing I feel I do, is the journalling every day. I have been using the Project Life App for that. In some cases, I just printed that card out, as is! I bought the Merry & Bright kit in the app. Whether or not, I plan to print the app cards, I still record it there to start!

In some cases, I know I want to add my journaling onto one of my foundation pages, directly. I have been keeping an ongoing word document for those using text boxes in the sizes I need.

I found a "new" product that I think has become my new favorite. They are sturdy little hole punched tabs that can be added to almost anything and stuck in your binder! Above, you are looking at the back side of a journaled print out from the Project Life App. It became a 4x6 vertical insert. I just added a couple of small photos to the back with strip journaling.

So here is a work in progress of my Day 3. I chose to print a 5x7 of a fave photo from that day to go on my 6x8 full page. I need to still come back and do more with that! It's ok to leave a few things. I'll tell you why. I have 3 chipboard index pages that came with the Simple Stories binder. When, I did the DD Prep, I cut down my coordinated papers to match these tabbed chipboard pages but didn't glue anything together so that I'd have some design flexibility later. Here we are, and I'm still not gluing. For efficiency, I'll do all three (six sides total!) of those types of pages together. It requires the same tools (hodge podge and foam paintbrush). When, you don't have a dedicated scraproom, your brain comes up with different approaches! LOL.

Only half of Day 4! But, notice, the journalling is done! Won't have to remember or lose the details. So, here, you also notice another part of my process. I've been using the Picstitch App for my photos. This one was a simple 4 pics on a 4x6. In some cases, I cut photos apart, too.

Here's a screenshot of Picstitch. You have to visualize a little bit with this app, but once you start using it, that gets easier. It shows the layout choices as square, but you can change the aspect ratio to 4x6. So that highlighted one above becomes 6 2x2 square photos (see below).

 IF you are going to cut your collage apart, I like to beef up the borders! To get this feature (shown above), you do have to get the paid version of this app. I think it's worth it, IF you are a "bordered photo person." I have no affiliation with PicStitch, by the way!
A little bit of photo management can go a long way with this project. As the week went on, some activities produced tons of photos. I would "favorite" photos I thought I'd use, so the selection process was done!
I'm going to give you a suggestion that I did not do the first week, but plan to do starting now! Take photos of your foundation pages for referring to throughout the week. I do not physically put it all together every day, but I'm journalling, editing photos and printing stuff! Knowing what foundation pages that I have for each day would make it more efficient. For me, this will be great because I do a lot of prep on my phone that is with me wherever I go.

Another example of those little attachers, used on a vertical 4x6 journal card created in the Project Life App. Love this genius product (hop over to my blog post, if you'd like links to some of this kind of stuff).
 Notice that I left a bit of space at the top of my journaling so that I could add a title. By the way, the black chipboard letters were a recent Target HotSpot find!!
Notice that I left a bit of space at the top of my journaling so that I could add a title. By the way, the black chipboard letters were a recent Target HotSpot find!!
Backside of the Tree Farm journalling. It's another PicStitch photo. I added the "JOY" sticker from the Heidi Swapp collection included in the Take 10 Kit.

Here's another 5x7 placed on one of the Take 10 Kits' 6x8 papers. Love the plaid. Those tree and "Christmas" embellishments were made during my prep work with the Take 10 Kits Days of December stamp set, which is still available! AND, by the way, the Days of December pocket kit including 6x8 papers is still in the shop, too. These are exclusive to Take 10 Kits!


Another new-to-me product that I'm digging is on this spread! And here are some of those smaller photos cut apart from collages made in PicStitch.
 Here's a closer look. That upper left PL App 3x4 journal card is in a 3x4 self-adhering flip-up!
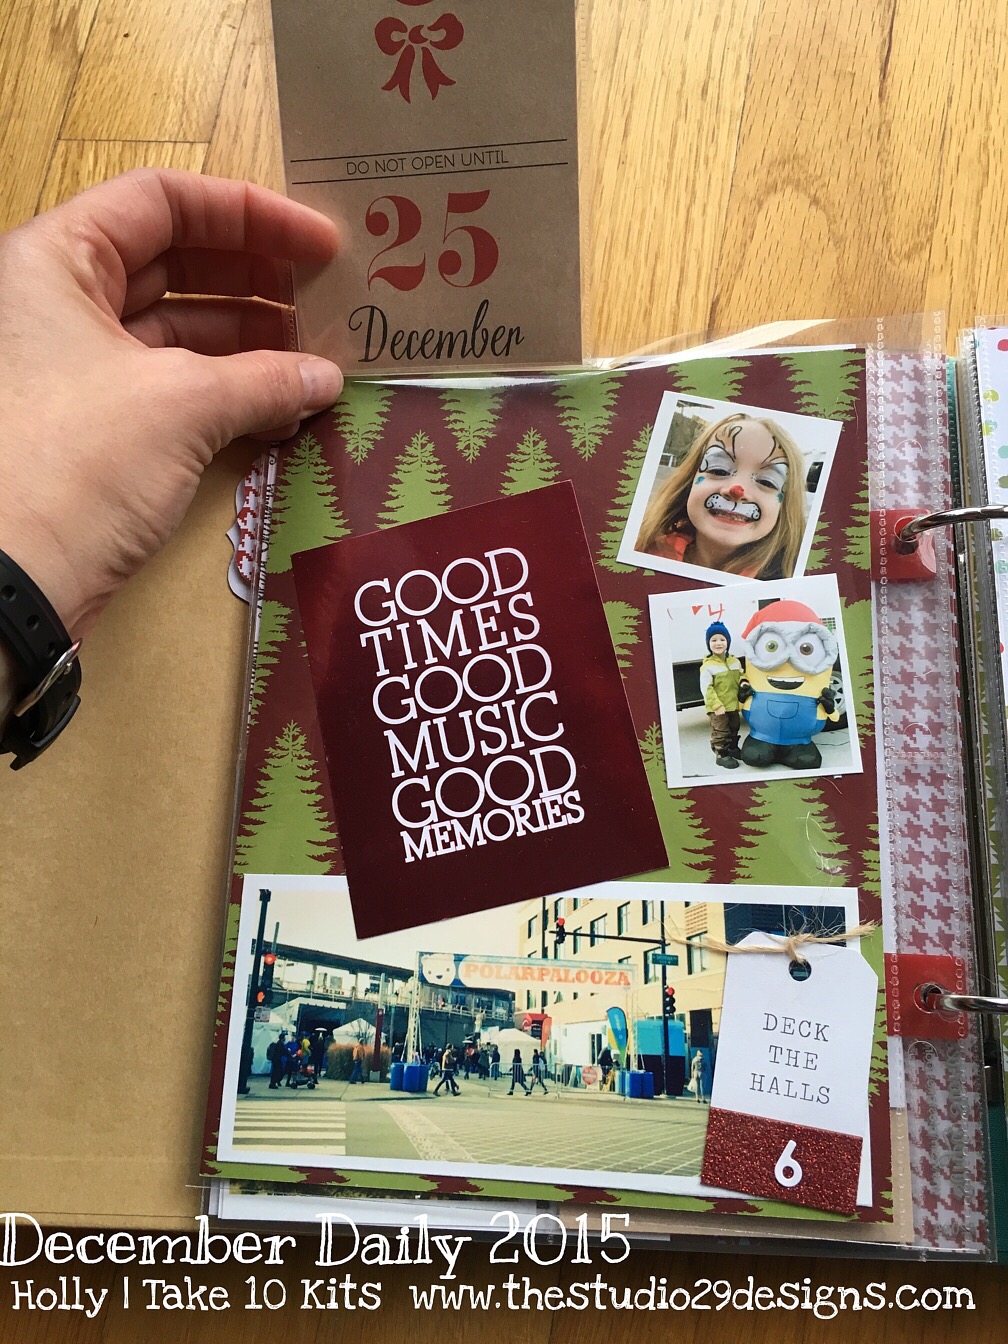
I stuck it right on top of the 6x8 page protector. It was forgiving! I didn't quite get it started as straight as I'd like, and was able to peel it back off (gently) and re-align. This was to fun to use and useful!

There's index divider number two that will require some more work. Saving it until all three are ready to go! And I had to have the "bokeh" tree shot. Check that off the list.
This December Daily album is a lot of fun and has inspired me to make sure we make time for lots of special holiday memories.
Affiliate links for the products in this post:
BasicGrey Attach Me Stickers, Emerald/Seafoam
No comments:
Post a Comment