Showing posts with label #studio29designs. Show all posts

Tuesday, June 28, 2016

A Day at the Beach - Project Life Style

Day at the Beach Project Life www.paintedladiesjournal.com

A day at the beach is always fun to document, right? Happy faces. Sand castles. Buried toes. It's the quintessence of summer!

Day at the Beach Project Life www.paintedladiesjournal.com
 I saw these two cards in the June Take 10 Kit, and new I wanted to record some beach memories. The waves! Perfection.
Day at the Beach Project Life www.paintedladiesjournal.com
Ugh! This boy. This might be my favorite photo of him of the summer! Fresh haircut and pure joy on his little face. That was a lucky moment to catch on my camera.

Day at the Beach Project Life www.paintedladiesjournal.com
Speaking of fresh haircuts, there was a cute conversation the day before that I wanted to record here, between my son and my husband.
Hubby: Want to go get your haircut? (enthusiastic smiles)
Son: No. (deadpan)
Hubby: You get a lollipop after it's done.
Son: (not missing a beat) When are we going?
I printed it on vellum to let the wave pattern show through. I did a post awhile back on my journal printing process. Go here to find it!

Day at the Beach Project Life www.paintedladiesjournal.com

I love having a big blank sky to put a title on! Don't you? Those Simple Stories stickers are very sticky, so be sure you have it where you want it before applying! But, I love them! Find them in the June Take 10 Glam Bag.

Day at the Beach Project Life www.paintedladiesjournal.com

I used a label sticker for the date and paired it with a word phrase sticker and enamel dot in the lower left corner of the page.

What are your favorite summer memories to document?


Tuesday, June 21, 2016

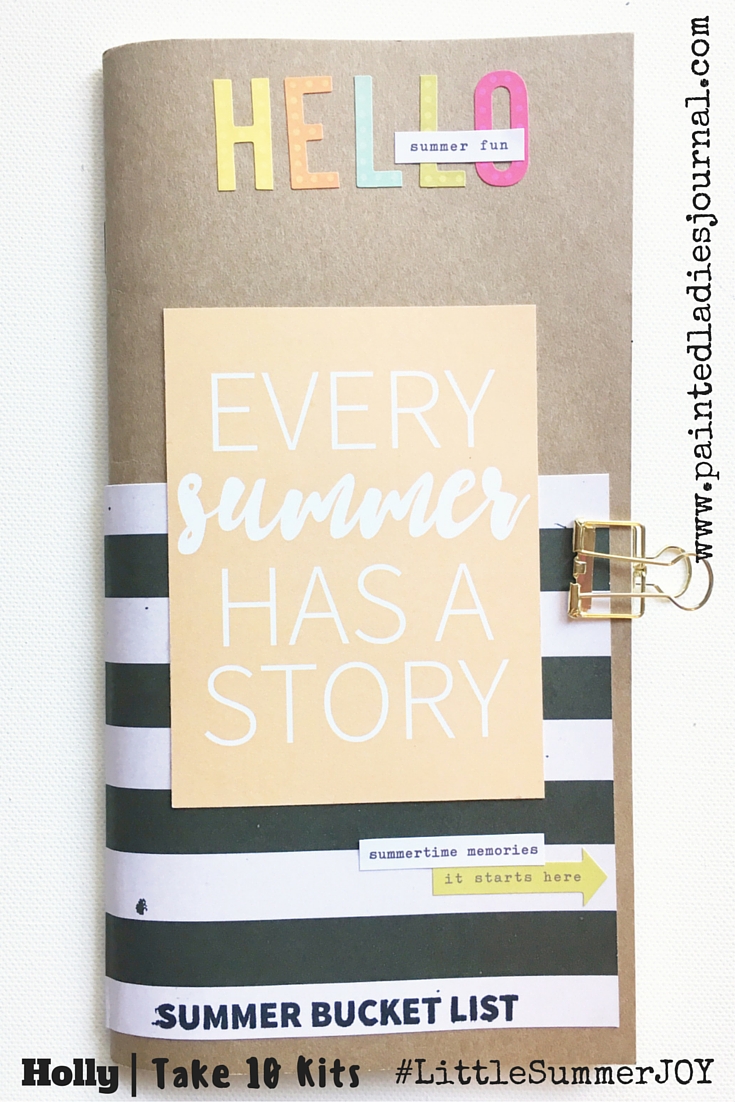
Traveler's Notebook Cover for #LittleSummerJOY

www.paintedladiesjournal.com

I think we are the last in the nation to still be in school....so I am just a wee bit ready to get a SUMMER BUCKET LIST moving right along. Is anyone still suffering along with me?? Our last day of school is today, June 21st!! The first day of summer!!!!

www.paintedladiesjournal.com
Have you heard about this fun FREE class hosted by Little Paper Products, called LittleSummerJOY? They did this amazing, inspirational class last summer, too and there were some very talented contributors. I can't wait to see who they have lined up this year! It is starting July 1, so go check it out. I was excited to get my June Take 10 Pocket Kit and Glam Bag because I just knew it would have some goodies to use for this project!! I kept a few items from my May Kit too (that flip flop card and "Summer Nights" wood veneer) that will fit well with this theme, too.

And the stamp "Summer Bucket List" is from the May Take 10 Pocket Kit, too.

www.paintedladiesjournal.com

I pasted the printable from Little Paper Projects into the first pages of my Traveler's Notebook and filled it in with all the fun things we want to do this summer. You need to go sign up for their newsletter to get this printable!

Follow along over on my blog for more on this project, as it progresses at www.paintedladiesjournal.com

Holly | Instagram | Facebook

Tuesday, June 14, 2016

Using GIANT Elements in your Project Life Album

Monthly Project Life. www.paintedladiesjournal.com

I don't do weekly PL. So, I like to indicated the beginning of a new month. These giant wood monthly wood veneers are making a GIANT statement in my book....

Monthly Project Life. www.paintedladiesjournal.com

Field Days! This is a fun week at school. Our school has an opening ceremony on the first day of school. Complete with a running of the torch to the theme song from Chariots of Fire. It's awesome. I'm using the May Take 10 Kits in this layout. 

Monthly Project Life. www.paintedladiesjournal.com

AND, since it is my first page for June, I added this huge JUNE wood veneer from the set I bought from www.thestudio29designs.com (home to Take 10 Kits - also available as a subscription). These Jumbo Month Wood Veneers fit perfectly in a 4x6 pocket and it's a set of all 12 months. There are a few left if you didn't grab one when they first came out. I love these and all of the wood veneers produced by Sara Mitchell.

I love Sara's wood veneers because they are so thin!!

I've always strived to keep my Project Life albums to one volume per year, but the last two years have so many thick embellishments, they are two volumes each. I know this is common, but I really don't want that many albums!!

Monthly Project Life. www.paintedladiesjournal.com
I put two coats of acrylic paint on my wood veneer. Eek! It curls up quite a bit, but don't worry. I did stand it up on it's end to dry so that the painted sides weren't touching my wax paper and could dry properly. The "Juicy Melon" paint was picked up from my Target Dollar Spot just last week. I was happy with it for this project.

It curls up but don't worry! After it dries, just put it between wax paper and stick it under a heavy book.

It flattened out within a couple hours.

Monthly Project Life. www.paintedladiesjournal.com

Monthly Project Life. www.paintedladiesjournal.com
The three musketeers! This was their first Field Day as Preschoolers last year. What fun it was to experience with them.

Monthly Project Life. www.paintedladiesjournal.com
My daughter happened to be sitting by her wonderful teacher and I got a quick photo while the whole school was assembling on the field and settling in. We just had our field days this week again this year, so it was fun working on last years page to see what a difference a year makes.

Holly | www.paintedladiesjournal.com

Follow me on Instagram and Facebook!


Tuesday, June 7, 2016

Graduation Cards!

It's Graduation Season! This year I have two cousin's with daughters that are graduating from high school. I use a couple of the May Take 10 Pocket Kit 4x6 cards as the base for these two cards.  (Anywhere I just say "kit," I'm referring to Take 10 Kits!

Graduation Card by Holly www.paintedladiesjournal.com
This one used the pink ombre 4x6 from the May Pocket Kit. Last week, I downloaded some of the digi freebies from The May 2016 Digital Press DigiScrap Parade. (check the link, some may still be available) They do these blog hops each quarter, offering a sampling from their designers. I suggest getting on their mailing list if you want to know when the next one happens. I grabbed the "Congratuations" from designer Bobbie Smith of River-Rose Designs.

Graduation Card by Holly www.paintedladiesjournal.com
The washi was from my stash. Some Target Spot. Some Stampin' Up. I cut them at varying lengths and made them look like arrows. I laid them down and wrapped the edge around the pink card.

Graduation Card by Holly www.paintedladiesjournal.com
On the inside, I adhered a trimmed down 3x4 card from the May Take 10 Pocket Kit. (This was a tough call because I could totally see using that card in my PL album for a fun summer adventure.) But it was just too perfect for this graduation card!

Graduation Card by Holly www.paintedladiesjournal.com

On the back of this card, I used the exclusive stamp from the May Take 10 Glam Bag. Again, perfect for a grad card!! Also, note the beautiful gray striped paper. I printed this from my freebie collection as well. It was also from River-Rose Designs.

Graduation Card by Holly www.paintedladiesjournal.com

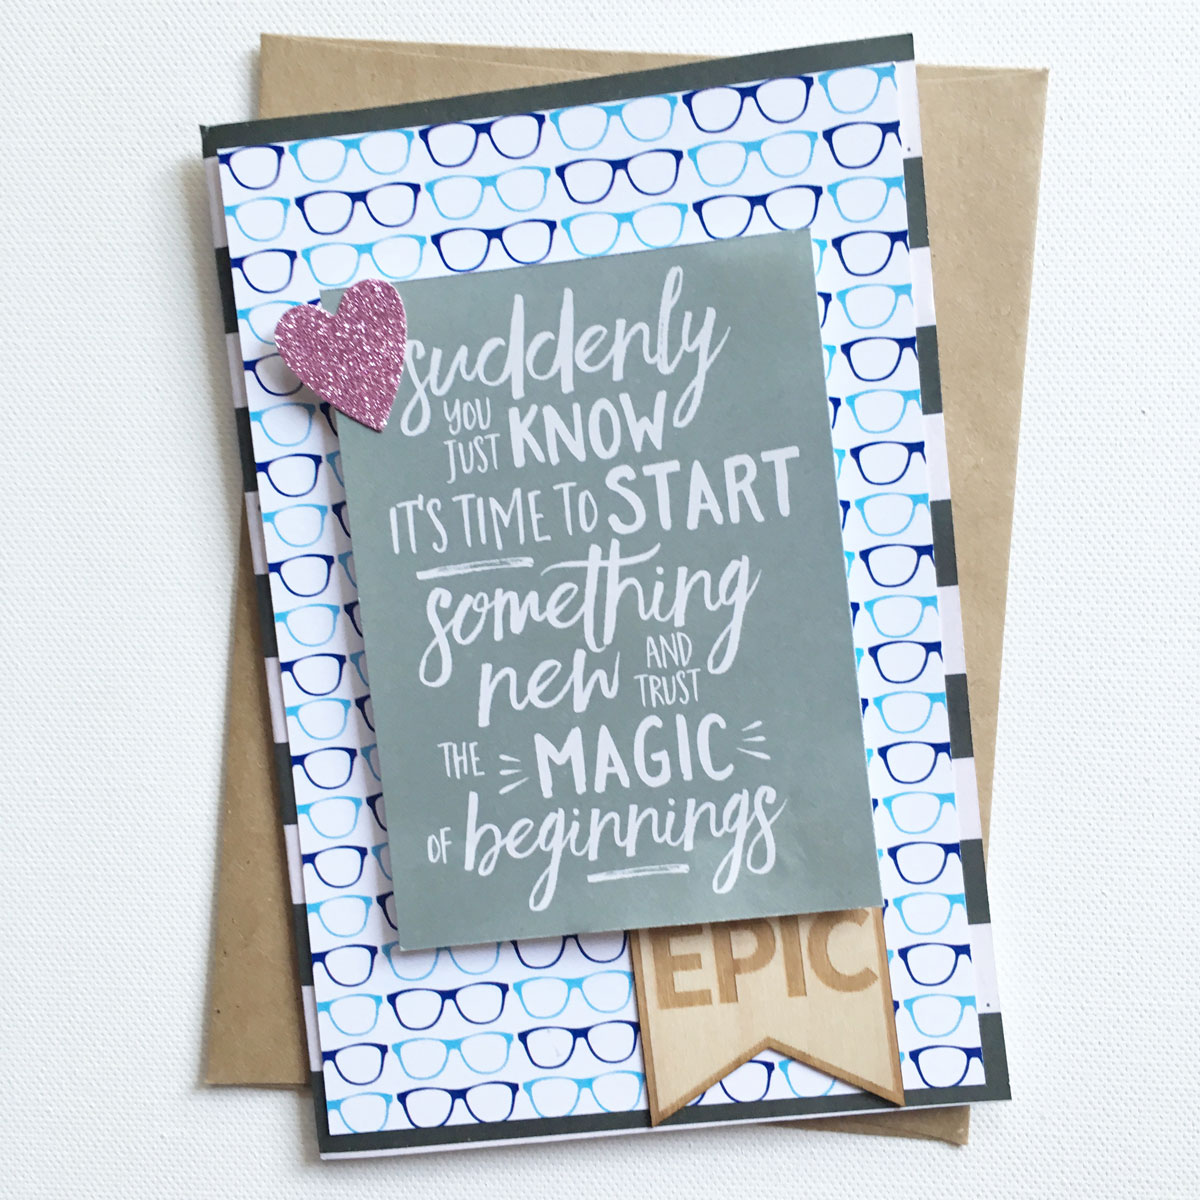
Next card! This one could totally have been for a guy! BUT, it's not and I added the sparkly heart from the May Glam Bag for a little feminine touch. The glasses! I just loved this card from the Pocket Kit and decided to pair it with a few more printable freebies. The gray filler card was a freebie from Juno Designs. Perfection. I added the "EPIC" from the kit.

Graduation Card by Holly www.paintedladiesjournal.com
Used that stamp on the inside of this card.

Graduation Card by Holly www.paintedladiesjournal.com

And the base of the card was a paper freebie by Laura Banasiak Digital Designs. The other add-on on the back from Juno Designs.

Graduation Card by Holly www.paintedladiesjournal.com
I can't wait to give these out! Do you ever use your journal card stash (I know you have one) to whip up some cards?


Tuesday, May 31, 2016

May Project Life Layout - Carefree

May 2016 Take 10 Kits www.paintedladiesjournal.com
I'm sharing a simple Project Life Layout today with the new May Take 10 Kits. I had several fun pictures of my youngest that morning in May.

May 2016 Take 10 Kits www.paintedladiesjournal.com
I used my 2" Fiskars Punch on a close-up of my son with the giant dalmation lovie that he had to hold in the cart at Target. I really thought I was going to be walking out of the store with that huge puppy. I paired it with one of the exclusive wood veneers. I really like these veneers because they are very thin, so don't add a lot of bulk to your pages. Those word strips are by Tim Holtz.

May 2016 Take 10 Kits www.paintedladiesjournal.com

I love that I captured this moment. I like using filler cards as backgrounds for journaling. I chose to use vellum here so the pattern could show through.

May 2016 Take 10 Kits www.paintedladiesjournal.com
The washi is from Stampin' Up. I also used another Tim Holtz phrase sticker here. And the "Carefree" and "Yes" stamped images are from the exclusive set included in the May Pocket Kit

May 2016 Take 10 Kits www.paintedladiesjournal.com

The alpha stickers in the kit were great right over this photo with the spots!! 

Follow me on Instagram and Facebook.

Monday, May 23, 2016

Creating Currently Journal Cards for Project Life

Today's layout features that awesome stamp set from the April 2016 Take 10 Pocket Kit. Man, oh, man, that "Currently" Stamp (also available separately) was begging for that.
Strip Journaling and Creating Currently Journal Cards for Project Life. www.paintedladiesjournal.com

This week sits opposite my last layout from the epic Memorial Day Weekend (my last three blog posts included that series of five layouts).
Strip Journaling and Creating Currently Journal Cards for Project Life. www.paintedladiesjournal.com

Here they are together.
Strip Journaling and Creating Currently Journal Cards for Project Life. www.paintedladiesjournal.com

Since I used a filler card in one of my slots, I used a technique that I love in order to tell the story of these two pictures shown above. The little man stealing my lunch. I wrote out my journaling on white cardstock and then trimmed it down into strips which I pasted or stapled right on top of the photos.

Strip Journaling and Creating Currently Journal Cards for Project Life. www.paintedladiesjournal.comStrip Journaling and Creating Currently Journal Cards for Project Life. www.paintedladiesjournal.com

I used that currently stamp on top of some grid paper to create this journal card. I was deep into that "The Magic of Tidying Up" book at the time, so "currently reading" was perfect.

Strip Journaling and Creating Currently Journal Cards for Project Life. www.paintedladiesjournal.com

I pulled out my stamp supplies and got to work with the Currently Stamp Set from the April Take 10 Pocket Kit. It's also available separately, here! To create these, I did them in a way that gave me a variety of cards for future use.  First, I stamp "Currently on each of them. Then, I set up several of the words, lining them all up on my acrylic block by lining them up on the grid cards for good spacing. I stamped a few with each set up.  For some, I spaced the words apart for more writing and some are meant for short answer journaling.

Strip Journaling and Creating Currently Journal Cards for Project Life. www.paintedladiesjournal.com

I also stamped that awesome line of chevrons in different spots on each card. Have you used this stamp set yet? Do you plan on making some journal cards with them?


Monday, May 16, 2016

Memorial Day Weekend Project Life Series

I've been sharing a series of layouts from last Memorial Day Weekend. I ended up with five 12x12 pocket pages and here are the last two. This weekend, the entire family was together non-stop. My husband has three siblings and each of them has three kids. Lots of cousins. 
Project Life www.paintedladiesjournal.com
Grandma had just got moved into my sister-in-law's home from the hospital and she was craving some time with her family, as were all of us.
Project Life www.paintedladiesjournal.com

I used the April Take 10 Kit for all five of my weekend pages to document everything we did together. I knew that I wanted to pair this particular card with a great picture of my mother-in-law. I cherish this selfie with my daughter and her, and so thankful for her smiles and willingness to do it.

Project Life www.paintedladiesjournal.com

Another great card from this kit for this weekend documenting. Since she had many titles, I added "Grandma", "Grandma Woo Woo" and "Mama G" to personalize this card. And I added the cute crocheted clip from Shepherd's Song Creations that was included in the April Take 10 Kit.

Project Life www.paintedladiesjournal.com


Here is the last pocket page from our Memorial Day Weekend 2015!

Project Life www.paintedladiesjournal.com

First let's talk about that top photo! I took a panoramic photo with my iPhone. It's not really smooth, but I gotta say I love how it turned out. It was a huge table and everyone tried to squeeze in for a family favorite - a dice game called Left Right Center. I brought the photo into the app "PicStitch" and put half and half across a 4x6 frame. Then, I brought it into the "Phonto" app and added the words, "Left Right Center". I lined these up on two 4x6 pocket cards and used the bottom half for title, journaling and embellishing.

Project Life www.paintedladiesjournal.com

I split one more 4x6 photo across two 3x4 slots. Be careful not to cut through a person's face when doing this.

Project Life www.paintedladiesjournal.com

I printed my journaling to fit over the blue journal card (I did a great tutorial on printing for journal cards) and adhered it with some of the washi tape from the kit. Then, I got use of another card and added a smaller photo on top. I created this photo size in that app, "PicStitch". That little flower die cut was created with the stamp set in the April Take 10 Glam Bag. Then, I used my chalks to color it in.

So, this wraps up my 5 pages of Memorial Day Weekend 2015. The last two posts can be found here:

Thanks,
Holly from www.PaintedLadiesJournal.com
Find me on Facebook and Instagram

Tuesday, May 10, 2016

Documenting Big Event Weekends with Project Life

www.paintedladiesjournal.com
Sharing a two-page spread today using the April Take 10 Kits. This spread continues the Memorial Day Weekend 2015 page that I shared last week. That post focused on fitting more photos into your pocket page layouts. You can see I'm practicing those same ideas again in this spread. How do you include bigger events, like a long Memorial Day Weekend that span several days and include lots of photos? I ended up with five 12x12 spreads that I jammed lots of photos into. For me, I don't have weekly spreads, so I figure it all balances out by the end of the year.

www.paintedladiesjournal.com

Here's a closer look at the right side. 

www.paintedladiesjournal.com

We decided to celebrate my youngest's birthday since everyone was already together. It was perfect. I found a hamburger cake that looked awesome! I took a chance and stamped right on the photo with that #celebrate hashtag stamp from the Hashtag Stamp Set. I say "risk" because my Stazon inkpad was dry, so I used my regular black. If you are in this same situation, you just have to be careful when stamping and then wait a bit longer for it to dry.
www.paintedladiesjournal.com

I used a flip here! (Fitting more photos!) and used the washi tape from the kit to adhere it and create a little tab.
www.paintedladiesjournal.com

When I was taking photos this weekend, I wanted to make sure that they told the story of all that we did. One big part of our weekend, was the big screen outdoor movie in the backyard. What a memory. I got a shot of the uncles putting up the screen and one with a silhouette of my son's head watching the movie after dark. I chose to print my journaling on vellum so the lines on that journal card show through.

www.paintedladiesjournal.com

Here's a closer look at the right side of this spread.

www.paintedladiesjournal.com

I really liked that birds on the wire card and chose it to create a little title card.  I used the stamp set that came in the April Take 10 Glam Bag to add a few "black" birds to the card. And used some of the washi from the kit to add more black.

www.paintedladiesjournal.com

I love adding little strips of typed journaling for those little bits of info I want to add.

www.paintedladiesjournal.com
In the upper right card, I layered two smaller pictures together. I created a little 4x6 collage in the PicStitch App and then cut them out.

This post is part of a Memorial Day Weekend Series. The last installment is coming next week.
Here is the first post of this series: Fitting More Photos in Project Life.

Thanks for joining me today!

Follow me on Instagram | Facebook