Showing posts with label Project Life. Show all posts

Thursday, March 23, 2017

The Slow Switch - From Physical to Digital Scrapbooking

This post is also found over on Amber LaBau Design's Blog, here. This post contains shopping links at the end!

Holly Genc | www.paintedladiesjournal.com

The Slow Switch.... It has been a process for me and I'd like to share it. Maybe someone will offer up some advice to me. Maybe someone will find something useful for their own journey. Either way, I welcome any new ideas!
It's SO exciting when Persnickety Prints shows up at your door!
First, let me tell you my process as a physical scrapper. I'm on a few Creative Teams (lucky girl), so that does probably lend itself to a different process. I used to CT for a physical Pocket kit club, called Take 10 Kits. I had transitioned to solely doing pocket style physical scrapping back in 2012. I would get a kit and go through photos from any time period that hadn't been previous scrapped and that I felt went with the kit. Many times, I'd be working on the previous year, same month since monthly kits tend to best suit the month they were designed for (go figure). So, basically, I would skip around all over the place, creating layouts. (I still do this with digital!) That said, I still put them in my books in chronological order. It has always worked well for me. I currently put tabs in my older books that still have gaps I want to fill.
Look at that healthy stack! My first order was 50 prints.
So, I could have made a clean break, when I decided to go to digital. I could have finished up all the gaps in my albums, continuing to do physical layouts for those years. Then, my digital layouts could have started at a certain date, going forward. But, since I used binders, I will just be printing 12x12 layouts for my older albums, as I fill them in (Persnickety Prints!) and then slip them into my binders.

There is my Cozy Layout, using COZY CARDS, COZY FULL KIT by Amber LaBau
I will have to be mindful of pocket pages matching up with fronts and backs of digital pages, but I think I can make it work. I saw a post by Amy Tangerine where she just stapled the two different page protectors together to eliminate that problem. I wouldn't want to do that too much, but here and there to solve a problem would work!
My most current physical scrapbooks.
These aren't all my scrapbook binders, but they are the ones I'm most often referring to at the moment. I keep them on our main level in my craft storage shelving, for easy access. I bought a new Project Life Binder for each year starting in 2012. These are for 2014, 2015 and two for 2016. The smaller 6x8 on the end is a personal scrapbook about myself.

It's hard to see, but Amy Tangerine made that "Happy Birthday Holly" sign for me. Reset Girl is in there, too!
It was exciting when my first 12x12 print order from Persnickety Prints arrived, but it was even better finding all the spots to put my new pages into the book. I grabbed a box of 12x12 page protectors and got to work in each album.

There is a Little Moments Layout, using Little Moments cards and Elements by Amber LaBau Designs
When you work this way (skipping all over the place), these monthly tabbed dividers come in very handy! There were several sets that were sold to match the different Project Life Kits. They also sell plain tabbed dividers that you can label yourself.

These photobooks belong to my friend, Luly Gonzalez.
Then, starting with 2017, I will start printing photobooks. My plan is to print two volumes per year. Above is Luly Gonzalez' photobook collection. She prints 10x10 and loves it. I haven't decided whether to go with 10x10 or 12x12. What would you print?
Luly's books take up much less room on the shelf!
I've already started uploading layouts to a book in Shutterfly. It's a good back-up plan for your layouts, plus it is way easier to do them a few at a time, rather than compiling an entire book at once. I do the same with Persnickety Prints. I upload a few at a time to the same folder and when I have enough, then I'll order. Again, a good way to back-up your files.

And there you have it. Did you make a switch from physical to digital? Was it slow or quick? Did you always do digital? I just love that I'm getting our memories in books!

Holly Genc

Want to know where you can get some of the items I've shared in this post? The following are some recommended affiliate links.
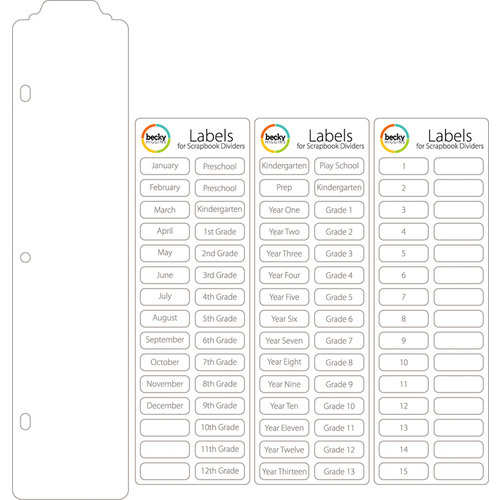

Becky Higgins - Project Life - Scrapbook Dividers and Label Stickers - 15 Pack
 (Scrapbook.com)


Universal 12 x 12 Page Protectors for 3-ring Albums - 50 Pack
 (Scrapbook.com)


Becky Higgins 12x12, 60 pack (Amazon), click on image
       
Here are a few of the 12" Dividers from Becky Higgins (Amazon), click on images

  
Here are the 4 - 12x12 binders on my shelf! All available still on Amazon. Click each image.


And here is the 6x8 binder, also on my shelf. (Amazon)

Wednesday, October 19, 2016

How I use the Project Life App to Plan and Keep Up in my Physical Albums

Are you a physical Project Lifer? I know, I like holding and creating physical layouts. It gives me joy. Think you have no need for the Project Life app? Think again. I'm going to share with you how I use it to aide in my physical pocket page layouts.

Project Life App for planning physical pages - Holly www.paintedladiesjournal.com


It's not just about pre-planning my pages. It's also a way for me to get some journaling done while it is still fresh in my mind. I love capturing the details that I know I won't remember later. 

I'm not going to go into how to create layouts, there are lots of good ones out there. Becky Higgins has done it here.  I'm going to show you how I organize and set myself up to print the photos. I will note that I don't worry too much about which journaling cards I am using in my app layouts because I usually use something different later, BUT sometimes it's so perfect I just print the journal cards, too.

Project Life App for planning physical pages - Holly www.paintedladiesjournal.com


So after you have created your page, you can save it by the date the photos were taken. Click on the "More Options" under "Completed Pages".

Project Life App for planning physical pages - Holly www.paintedladiesjournal.com


From here, you will click on the page you want to update and select "Update Page Info"

Project Life App for planning physical pages - Holly www.paintedladiesjournal.com


Correct the date to match the layout photo date. There is a spot for a "name", too. I usually put in here a code "PPx", meaning that I have uploaded the photos to Persnickety Prints for this layout.

Project Life App for planning physical pages - Holly www.paintedladiesjournal.com

You want to either export these and save them by date in a Dropbox folder (I do this so I can flip through them easily in order and see what type of pocket page I need next, if it's not the typical Design A.) or leave them all in the PL app. Then, you can go back and refer to the layout configuration and the journaling when you sit down to scrap.
Project Life App for planning physical pages - Holly www.paintedladiesjournal.com

I have a folder in Dropbox called "Project Life" where I save them by year-month day format so they save in chronological order.

Project Life App for planning physical pages - Holly www.paintedladiesjournal.com

Next up, order those photos, if you are batch ordering from a service like Persnickety Prints. And when they arrive, do the happy dance and start filling in your pocket pages!! I just love white borders!

Project Life App for planning physical pages - Holly www.paintedladiesjournal.com

Now, I like to skip around and do which ever page goes with what products I'm excited to work with. Eventually, it'll all be done and in chronological order. Look at all those pages layed out and ready to be scrapped. The best part!

What is your process for getting photos in your albums? I know this may seems unusual but my process has totally evolved for the better (for me) over the last year. It's working and I love it. I'd love to hear your ideas for getting your photos printed!

And if you want more ideas for using the Project Life App as a physical scrapper, Becky Higgins wrote a great article showing lots of other great uses the apps specifically for this. Find it here.

Go here to purchase this app (this is an affiliate link, thanks! Affiliate links send a few pennies my way and do not cost the purchasers anything extra)

PROJECT LIFE APP iOS
Project Life - Becky Higgins LLC

This is my favorite editing app - the brighten action is worth the whole app.
PicTapGo - Totally Rad! Inc.

Tuesday, August 23, 2016

Themed Pocket Scrapping

Holly with www.paintedladiesjournal.com using the August Take 10 Kits for a themed pocket page spread with insert

Are you a "play by the rules" Pocket Scrapper? Okay, so there aren't really any rules. But, typically you see Week 1 through Week 52. I do like the creative Week Title Cards. But I just can't scrap that way, but I love pocket pages. So, when I have a big day at the zoo with cousins, I end up with lots of fun pictures that I want to include. I narrow it down and put them in a two-page spread with an insert. 

Holly with www.paintedladiesjournal.com using the August Take 10 Kits for a themed pocket page spread with insert

We spent a FULL DAY at the zoo with cousins and I ended up with so many photos from one day. Here is the first page with insert. I'm using the new August Aurora Take 10 Pocket Kit and Glam Bag.
Holly with www.paintedladiesjournal using the August Take 10 Kits for a themed pocket page spread with insert
The Glam Bag included these awesome acrylic hearts from Color Cast Designs. Love! I paired it with an exclusive wood veneer from the same kit.

Holly with www.paintedladiesjournal using the August Take 10 Kits for a themed pocket page spread with insert

I used a splash of watercolor on top of these weekday card and then stamped the day of the week on top. 
Holly with www.paintedladiesjournal using the August Take 10 Kits for a themed pocket page spread with insert

Here is the second spread with insert that concludes our day. 
Holly with www.paintedladiesjournal using the August Take 10 Kits for a themed pocket page spread with insert


I created a tag with the stamp set to add as an embellishment.

Holly with www.paintedladiesjournal using the August Take 10 Kits for a themed pocket page spread with insert
And added star wood veneers from a past Take 10 Kit. I love the wood veneers because they are thinner than typical.

Holly with www.paintedladiesjournal.com
Follow me on Facebook and Instagram!

Below you will find a few affiliate links of my favorite supplies. Affiliate links kick back a small amount of money to the blog, and cost the buyer nothing extra. Thanks for your support!


My favorite apps for editing photos and creating collages for cutting up for this midori project:

PICTAPGO for editing. The lighten is awesome on any photo.
PicTapGo - Totally Rad! Inc.


PICSTITCH (paid version is needed to create thicker white borders - so worth it) for collages.
Pic Stitch - #1 Photo and Video Collage Maker - Big Blue Clip, LLC


Zig Memory System Calligraphy Dual Tip Marker, Carded, Pure Black


Faber Castell Mix & Match Color Gelatos Tropical 4 Piece Set


  CANON MG7520 Wireless Color Cloud Printer with Scanner and Copier, White (Discontinued By Manufacturer)


Watercolor Paints
 
Zig Watercolor Brushes

 
  Canon Photo Paper Plus Glossy II, 4 x 6 Inches, 400 Sheets (2311B031)