Showing posts with label stamps. Show all posts

Monday, April 18, 2016

Happy Day Stamp and Washi Tape Tip!

Hi Crafty Friends! How did you use your exclusive "lucky" wood veneer from Studio 29 Designs, LCC March Take 10 Kit? I love how thin it is. 


I contemplated using the other similar blue 4x6 card in that upper left spot, but I just have too many photos I wanted to use (typical me). That photo especially needed to stay because that would be the last time we visited that neighborhood establishment (which had been there since our younger times first living in the city) before it was sold to become something else. I'm a little sad about that but excited to see what new place is coming.


I chose to back my "lucky" veneer with a stamped image from one of the stamp sets this month in the shop, called Happy Day.


I stamped the outline image of the branches on white cardstock first, and colored the leaves in with my  Stampin' Up Stamp & Write marker set. Next, I stamped the solid branch image in a little shade of bluish-green over top. Then, I fussy-cut it out to layer behind that wood veneer.


I love that this marker set is double ended (fine point and brush tip). I use them for journaling, stamping, and coloring! If you don't have a Stampin' Up demonstrator, you need one and I've got one for ya. Mary Talbot is one of my besties: Stampin' Up - Mary Talbot. Another little "something about Mary", she makes really awesome planner stickers that you can find on Etsy. Follow her on IG for the info: www.instagram.com/plannerwhimsy 


I used the washi tape from the kit, but I wanted it to be skinnier strips for this application. I have a little tip to share about washi tape that rocked my world the first time I heard it (I don't remember where that was, or I'd give them credit!) Woo Hoo! It peels right off and isn't stuck to your scissors or anything else.


I love little tips like that. What little tip do you have that you wish you knew before?


Other posts you may like: 


I use a Canon Pixma to print at home. Here are a few affiliate links, if you so chose. I print some of my photos and home any journaling I decide to print.


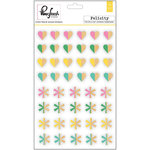
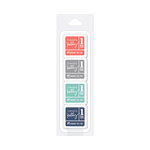
Pinkfresh Studio - Felicity Collection - Block Wood Stickers - Color Hero Arts - Kelly Purkey Collection - Ink Pads - Urban

Tuesday, July 7, 2015

Take 10 Tuesday | Resize Your Stamps

Disclaimer: Many stamp companies have copyrights on their images. Please seek permission from the company before altering their stamps in any way.

The Studio 29 Designs Blog has a weekly "Take 10 Tuesday" Post and this week is my turn. Go check out past posts for more crafty tips.

Have stamp that is perfect for your layout, but need it to be a different size? That happened to me in my last layout I posted about here. I have a quick and easy solution that I whipped up with my scanner, printer and Photoshop Elements (PSE). I have a Canon Pixma one-in-all, that I used (love it.)


That ADORABLE Scoop stamp is still available, kids. Go get it here. I imagine using this stamp a TON this summer. Here's a step-by-step of what I did. There are tons of great tutorials out there for PSE basics, so please check some out if this isn't quite making sense.


  1. First, stamp the image onto white paper and scan it as a jpg.
  2. Open the jpg up in PSE. 
  3. I scaled my image down to a mini version and reset the CANVAS SIZE to 4x6 (because I knew I would print one a 4x6 piece of white cardstock). I made the resolution 300 for good printing.
  4. Make a box around the scanned image with the selection tool. 
  5. Copy and paste it. (Ctrl C, Ctrl V on a PC). It will automatically put your pasted image on a new layer.
  6. Right click on that new layer and select "duplicate layer".
  7. This third ice cream cone is where I filled in colors I liked with the paint bucket tool. Copy and paste that color combination. Then, repeat from Step 4 with new colors.
  8. After you've filled your canvas, save as a high resolution jpg.
  9. Print and fussy cut.
This took me roughly ten minutes from start to finish. If I'd been more ambitious I could have used my silhouette to cut out all of them. That seemed like too long of a process for my need at this time, but what a good idea if you need a lot of them.

Take 10 today to be crafty.
Holly Genc