Tuesday, April 5, 2016

Simple Marker Coloring with Stamps

It was such a sweet visit to the kindergarten classroom to meet the baby chicks that hatched. They are so cute and the kids love them and were so gentle with them. It was amazing! The March Take 10 Kit (Pocket Kit and Glam Bag) from Studio 29 Designs was a great match for these pictures. Baby chicks mean spring time to me!

Spring Pocket Page using March Take 10 Kits from Studio 29 Designs; www.paintedladiesjournal.com


I decided to leave a lot of white space on these cards. White space is good. You shouldn't feel like you have to fill in white space when you see it. Give yourself permission to intentionally leave it. 

Spring Pocket Page using March Take 10 Kits from Studio 29 Designs; www.paintedladiesjournal.com

I printed my journaling on vellum so you could still see the lines behind. I have a little tutorial I want to share on what I did for printing my journaling from my phone. Go here if you would like to see that!
I stamped that little bird on white cardstock so that I could cut it out and use a pop dot for dimension. And there is my pop of color on that black and white card!

Hello Spring Stamp Set

Spring Pocket Page using March Take 10 Kits from Studio 29 Designs; www.paintedladiesjournal.com

On my bottom 4x6 card, I had some fun placing sequins throughout the floral design. I cut up that "Spring Fever" 3x4 card to make a coordinating tab. (And I can use the other half on a different layout!) I made another little stamped bird for this card, too. For both birds, I got out my Stampin' Up Stamp & Write marker set. I am not a marker coloring guru, but I have watched a few tutorials. I have one tip to share that ANYONE can pull off. It can be done two ways. All I did here was give these critters a wash of a lighter shade of blue and then add a little bit of darker blue for a shadow under the wing. So cute and easy. You don't have to be an expert colorist. 

Simple Marker Coloring:
1. Give an all over wash of a lighter color.
2a. Determine where a shadow would naturally be (imagine the sun up and to the left for my birds) and use a slightly darker shade of same color family.
2b. Same idea as 2a, but just use more layers of the same marker you used for the wash to make it darker.

That marker set is very versatile. They are double ended (fine point and brush tip). I use them for journalling, stamping, and coloring! If you don't have a Stampin' Up demonstrator, you need one and I've got one for ya. Mary Talbot is one of my besties. She'll hook you up. Her site is here: Stampin' Up - Mary Talbot. In case you don't know, they sell exclusive Project Life sets, too. Check it out. 

Spring Pocket Page using March Take 10 Kits from Studio 29 Designs; www.paintedladiesjournal.com

My last detail photo shows a homework sheet that my kindergartner brought home during their study on baby chicks. It is so fun to include with these photos to tell some of the story through her eyes. I just took a photo of it and printed as a 4x6 on cardstock. 

Go find some baby chicks to visit this spring. They are so fun to observe.


Monday, April 4, 2016

Fun organizing project & using your Project Life Stash

It's Luly here today sharing a fun organizing post for Monday morning.  I know I am not the only who struggles with organizing all those little bits of paper that need to be handy - business cards, phone numbers, notes and coupons! I have a great love for clipping coupons but not for using them! Even though my kids are grown this is still an area I struggle with!. I don't like clipping to my fridge because it tends to look messy and un-organized no matter how many times you straighten it...

I came up with a great solution - partially based on a pin I saw on Pinterest (of course) - and I set of right away to implement! Plus it lets me use up some of my scrapping stash - especially!

I had painted the inside of a corner cabinet in my kitchen a few years ago - but it didn't really function how I wanted it to... I added a few letter stickers and a couple of 3M Command hooks and I am very excited to use my new mini work station.


I love having an easy to access spot to display my Wi-Fi code (which is very long). I will add it now that I have taken the photos.  I added two 3M Command hooks to hold 2 large binder clips. I added some colorful washi to add a little pizzaz.  I used them 3M in case I want to change or tweak my system.  Do you know they sell refills for the adhesive?  That way you can truly have them as re-usable.  I have had the best luck find just the adhesives at WalMart...

For my Notes binder clip - I am able to use part of giant (I mean GIANT) stash of Project Life cards. These are handy for those quick grocery or to do lists - and having a cute piece of paper or card always makes the task less unpleasant! Finally I used another 4x6 card to mark down some important phone numbers that nobody has memorized but call frequently... like Grandma's house or our favorite pizza delivery place.

I had some fun Making Memories Scrabble tile stickers to add the name of each "area". I am using one of the binder clips to hold all of my coupons (these were just the ones I got yesterday at Walgreens). I am hoping that having them handy means I will actually remember them... 


I might still add a post it note pad - I might use a small piece of 3M Velcro to attach to this same door so its all off the kitchen counter.  A trick I use it that I attach the 3M strips together and then cut in half - they are usually fairly large - this works great for pictures with thin wooden frames too!


Here is a close up of my Valentine's card to my hubby that I printed right from the Project Life app - it is one of the freebies that is top right hand corner of the app itself (see the grey flag..).  There are options there now for Easter, Valentines, New Years and Christmas.  There are some cute ones you can use to document Easter or just some cute spring photos.


My guess is they will continue to add to it as the year goes by - I am really hoping for some Graduation card options, since my oldest is graduation college in May!

That's all for now - happy organizing and stash busting!


Saturday, April 2, 2016

Printing Journaling from your Phone for Project Life Tutorial

Using Project Life App and PicStich App. www.paintedladiesjournal.com

Sometimes, I like to use a filler card for my journaling. I have physical cards I am using. I want to be able to read my printed journalling on top of the pattern, so I print on vellum or white cardstock to archieve this.

Using Project Life App and PicStich App. www.paintedladiesjournal.com

I used the Project Life App to do this quickly from my phone. I have an iPhone, so if you are using the app on an android, it may be slightly different.

Using Project Life App and PicStich App. www.paintedladiesjournal.com


From the main menu, select the orange image in the upper left section.

Using Project Life App and PicStich App. www.paintedladiesjournal.com

You will use the default selection if your end result will go on a 3x4 card. (And of coarse choose the 4x6, if you are using that.)

                                          
Tap on one of the 3x4's and some icons will appear in the upper right. Select the little cards with lines on them to access the card kits.


Using Project Life App and PicStich App. www.paintedladiesjournal.com

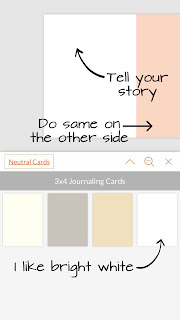
Then, select "Neutral Cards." This is a free set in the App. I like bright white, which is best on vellum. And I just like bright white cardstock, too. When filling in your story, don't worry about the margins that you cannot change. We will fix that in a bit. 

                                          
After you select your neutral journal card, you have to close out by hitting the "x". Then you will see this. Click on the pen in the center to start entering your text.

Using Project Life App and PicStich App. www.paintedladiesjournal.com
After you have both sides filled out (for two different journal cards) and have double checked your spelling and grammar, you are ready to export.

Using Project Life App and PicStich App. www.paintedladiesjournal.com


Select export and on the next screen, select "Save Image." This saves it to your camera roll.

Using Project Life App and PicStich App. www.paintedladiesjournal.com

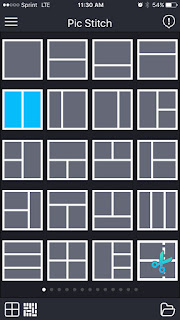
The next step uses another app called Picstich. If you don't have this, and you do Project Life, I totally recommend it. You will need the paid version to do what I'm going to show you here. Totally worth it, to me. The first thing you need to do is select the two equal slots that are a side by side layout. 

Using Project Life App and PicStich App. www.paintedladiesjournal.com

Then, pick the 6x4 aspect ratio. 

Using Project Life App and PicStich App. www.paintedladiesjournal.com

This is the step that is only available in the paid version. You can adjust the thickness of the white border. This is what fixes the size of your card so that it is smaller than your Filler Card. This image above shows approximately what I chose to make this work. (I use this paid feature for thickening the border when putting 2-3x4 photos on a 4x6).

Using Project Life App and PicStich App. www.paintedladiesjournal.com

Now you are ready to import that image of your journaling that you made. You will import the same image twice and line it up to show each card on each side. 

Import to your camera roll and you are ready to print on a 4x6 cardstock.

Using Project Life App and PicStich App. www.paintedladiesjournal.com

Using Project Life App and PicStich App. www.paintedladiesjournal.com

Using Project Life App and PicStich App. www.paintedladiesjournal.com


Why I like this: I used to open Word and make individual text boxes after measuring my cards. I'd have to fill an entire 8.5" x 11" to feel like I wasn't wasting paper. It was lots of measuring and took forever to fill a page. I like that I can write two journal cards and fill a 4x6 to print. AND, no more measuring since I'm using the 4x6 Project Life App template.

Do you use printed journaling in your layouts? I like to mix it up and put my handwriting in there, too, but when I have a lot to fit on the card, or just want the look, I will print. I'm always looking for easier, quicker ways to get my journaling printed.

Holly | www.paintedladiesjournal.com
Facebook  Instagram  Pinterest

I use a Canon Pixma to print at home. Here are a few affiliate links, if you so chose. I print some of my photos and home any journaling I decide to print.

Monday, March 28, 2016

Easter Sunday Egg Hunt Vertical Pocket Page

Hi, Pocket Page Scrappers! I have a sweet Easter Sunday layout today using the sweet March Take 10 Kits (Pocket Kit and Glam Bag) from The Studio 29 Designs, LLC. This month, when I got my kit, I had recent photos that I had printed from Persnickety Prints (love them). I distributed the cards with the best "spring feeling" pages and got to work on the first one, featuring some photos from April 2014 at our church Easter Egg Hunt.
 Easter Pocket Page using March Take 10 Kits www.PaintedLadiesJournal.com www.theStudio29Designs.com

I had not printed the April 2014 photos yet, though, so these were printed with my Canon Pixma. Scroll down to see what printer I use.  I just knew that a few of the cards in this kit really wanted to be paired with an egg hunt. Ha!

 Easter Pocket Page March Take 10 Kits PaintedLadiesJournal Studio29Designs

Sequins! They have been in the last few kits and I'm loving working with them. I got out my fine tip glue and tweezers. I love the scattered look, but this time I decided to try a more structured pattern. Keep in mind that you need to be lenient with making a pattern with sequins.

 Easter Pocket Page March Take 10 Kits PaintedLadiesJournal Studio29Designs

I kept the embellisments simple on this layout. I really like all the "white space" on the cards and wanted to keep it simple and clean. I picked a few of the PinkFresh Studio wooden embellishments that complimented those cards.

 Easter Pocket Page March Take 10 Kits PaintedLadiesJournal Studio29Designs

For the written title, I cut the end of my washi strip into a little flag. I learned that trick from an Amy Tan online class I took! (Scroll down find that class.) I added a little strip of white cardstock with the same little notch in the end and centered it on top of the washi to write my titles.

Are you using the March kit for any Easter themed pages? I'd love to see them.

Thanks,
Holly with Painted Ladies Journal.

The few links below are affiliate links. I ONLY share items that I personally use and love. =)


I absolutely love this Canon Pixma!
 

Travel Scrapbooking with Amy Tan CRAFTSY Online Class

Go here for a full review on this class. It is on sale right now!

Monday, March 21, 2016

Fresh Air and Snuggle Up: A few 6x12 Pocket Page Inserts

I used up the rest of my cards from the February Take 10 Kit by The Studio 29 Designs, LLC this month to create two 6x12 pocket page inserts. Both are very simple layouts, and I'm loving the crisp, clean look.

This was one of those first "warm" spring days last year. Everyone was happy to be outside playing.  You can still get the cards and stamp featured in this layout in the shop.

A simple way to switch things up with the same old pocket page is to put 2-3x4's in a 4x6 slot. That's all I did in this bottom pocket. I adhered that stamped "everyday life" with pop dots to add a little more interest.


Those white Studio Calico alphas are from my stash, as well as the coordinating Simple Stories gray label.


And here is my second 6x12 insert. I just adore this one!

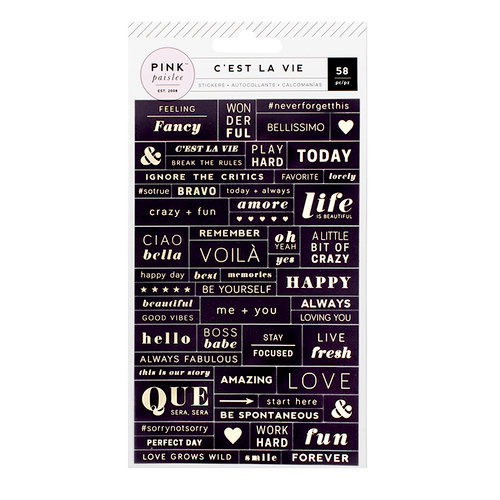
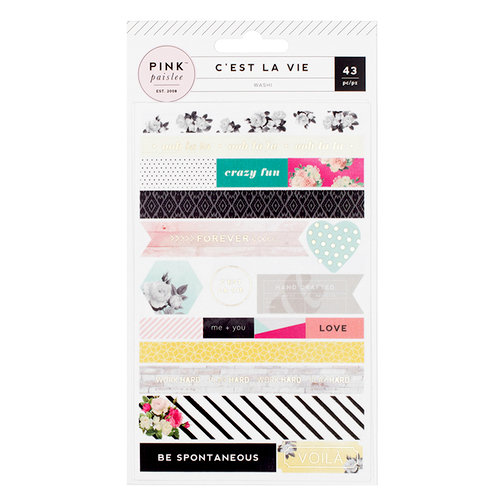
I chose that colorful stripe card for a little journaling. (Hint: when you are unsure how the pen you are using will work on a slick card, try it out on the back first). I used a black Sharpie Pen here. Then, I centered a few of the word stickers and one washi strip from the Pink Paislee C'Est La Vie collection that was in the February glam bag.

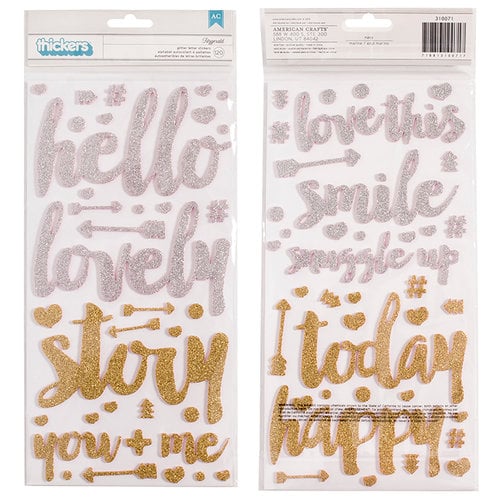
That "snuggle up" thicker was from my stash. How perfect for my little snuggler. It's from Pink Paislee's Cedar Lane collection.

And for my bottom pocket, I cut that 6" strip from one of the kit cards to put on top of my photo. I paired it with some more of the washi and a word sticker. 

Please note: Most of the links are affiliate links. Thanks for shopping with me. It helps support my blog and is no additional cost to you. Thanks!

I am a Creative Team Member for The Studio 29 Designs, LCC. Here are their products used in these layouts available in their shop:

xo Holly

Amazon, Pop Dots, Various Sizes:                                               
 
Scrapbook.com, Pop Dots, 3/8" squares:
  Forever in Time - 3D Pop Dots - Double Sided Adhesive - 3/8 Inch - Square


Pink Paislee - C'est La Vie Collection - Transparent Stickers with Foil Accents - Word Jumble Pink Paislee - C'est La Vie Collection - Washi Sheets with Foil Accents

Pink Paislee - Cedar Lane Collection - Thickers - Glitter - Foam - Phrases - White and Gold American Crafts - Amy Tangerine Collection - Finders Keepers - Enamel Hearts