Showing posts with label school scrapbook. Show all posts

Wednesday, November 1, 2017

School Album - Part 3: Creating Layouts

This post was first publish over at Amber LaBau Designs, here.

www.paintedladiesjournal.com | School Albums

Today, I'm sharing the next part of my School Albums Series. Previous posts were about  Organizing and Photographing Artwork (Part 1), and Making a Plan (Part 2). "Making a Plan" showcased my first two layouts which I plan to repeat for every school year. I recently spent some more time photographing artwork and other items from my daughter's 2nd Grade year (last year) and I'm back to show you what I'm doing with that.

www.paintedladiesjournal.com | School Albums


I feel that if you are behind (like me), it is good to start with the current year and work backward. So, I'm working on DD's last school year in second grade. It was freeing to be able to recycle that pile of papers after getting it all photographed. (I did keep 3 pieces of artwork that I plan to frame for myself and also use to create holiday gifts for family!)

www.paintedladiesjournal.com | School Albums

I chose to put photos in among the artwork and paperwork samples. I quickly went through my 2017-18 archives for the school year months to select the highlights related to school and extra-curricular activities. They are sprinkled chronologically with artwork that went with the season, but it wasn't a strict guideline.

www.paintedladiesjournal.com | School Albums

I wanted to include a lot of artwork, but also some of her writing. I plan to include a birthday picture, each year, like the one above with her number 8 candle. I really liked finding writing and artwork that described her second grade self. There was even one written by a classmate.

www.paintedladiesjournal.com | School Albums
Finally, saving all these pieces of school work is paying off! I love how the artwork combined with the photos has turned out. Coming soon, more pages for Second Grade that include pieces I want to include as originals.

Holly Genc


Monday, July 31, 2017

School Albums - Part 2: Making a Plan

I'm back with my next step in getting School Albums started. If you are anything like me, you have stacks of school memorabilia in bags or boxes in your closet and just need a system for starting! I did the first post on organizing and photographing artwork in June. Find it here.
Holly | www.paintedladiesjournal.com

Now, we get to the fun part, making a plan for all this stuff. I really like the idea of creating a design that includes everything I want to see in a school year and then repeating it, each year. Today's post included the first page, front and back. I chose to use pocket-style pages. They will be mostly hybrid, but some may be full 12x12 prints of layouts, as well. This all stemmed around the fact that I had been buying an 8x10 school picture and 8x10 class picture each year starting in pre-kindergarten. I really wanted to stick with 12x12 page layouts, and not add in an 8x10 insert for those. I wanted them to be part of the pocket page layouts.

Holly | www.paintedladiesjournal.com

Enter Stage Right: The Fuse Tool. I kept thinking about it and would it be worth it, creating custom pocket pages to make my idea work? I loved the idea too much not to try it. I played around in Photoshop Elements to see what kind of two-sided pocket page would work well and then got to it.
Holly | www.paintedladiesjournal.com

I watched some Youtube videos to get some tips for my first trial with the Fuse. I decided to also invest in the glass cutting mat and a longer metal ruler since I would be working with full 12x12 protectors. (Note: I bought a 12" ruler, but I suggest getting a 15" ruler) I inserted an 8x10 photo into the protector and positioned it where I wanted it, then fused a pocket around it. From there, I continued to complete my pocket page design. (HINT: When printing your other cards, measure the pocket and adjust your card size)


Holly | www.paintedladiesjournal.com

This two-sided page will be my first page each year. Here is the front. It has the 8x10 portrait school photo. I made a little title card to go in the bottom skinny pocket that showcases the grade and teacher's name.

Holly | www.paintedladiesjournal.com


I used a "Wonderful You" paper for a background to put the 2nd Grade title on, which is from "Through the Years." The teacher's name is spelled out with the "Blackboard Alpha". I chose to make a 4x6 card with photos of her two main teachers this school year in the upper pocket, again using "Wonderful You" paper and elements.

Holly | www.paintedladiesjournal.com
The bottom, right pocket is a "Wonderful You" pocket card that had lots of fun info to fill in about the school year.

Holly | www.paintedladiesjournal.com


I had to make a decision to be ok with the back page being read sideways. This type of thing typically bugs me, but I loved the custom pocket page idea so much that I got past this. So, the landscape class photo backs up to the school photo and here, I put in a "first day of school" picture, along with another card from "Wonderful You" that I will have Audrey fill out (now, because she just finished this grade!).

I'm pleased with this set up and plan to repeat it for each year for each child. Hope this gave you some ideas! I will be back soon with more progress on this album set-up. We have to do something with all those photos of school memorabilia that we took.

Here are a few affiliate shopping links to the items I have used in this project. Affiliate links do not cost the buyer anything more and send a few cents to the blog. Thanks!
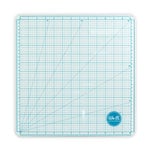


We R Memory Keepers - Precision Glass Cutting Mat
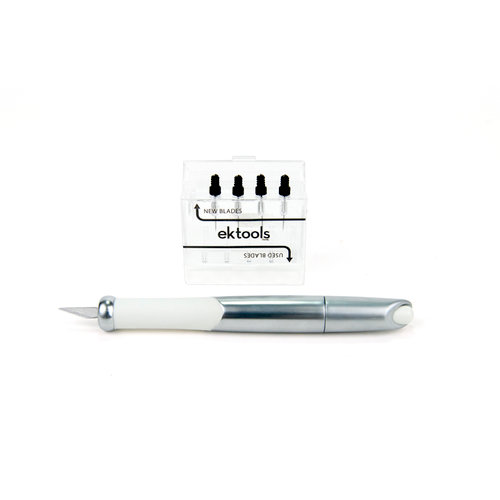
EK Success - EK Tools - Retractable Knife and Blades

 
15" Metal Ruler (click on picture above)


12x12 3-ring Page Protectors

Thursday, May 25, 2017

School Album - Part 1: Organizing and Photographing Artwork

This blog post was first published at www.amberlabau.com blog. Here at Painted Ladies Journal, you will find a few affiliate links throughout to point you to some of my supplies used in this project. Shopping with these links cost no more than normal prices and sends a little bit my way to support our blog!

School Albums Blog Series: www.paintedladiesjournal.com

I am in the process of setting up a school album for each of my three kids. My oldest is just finishing 2nd Grade and my youngest is in his first year of Preschool. I'm not too far behind yet, but anymore and I will start feeling that way. 


School Albums Blog Series: www.paintedladiesjournal.com

Over time I found the 12x12 binder albums that I wanted. Each child will have two matching binders and all six look nice together while they still live here.

We R Memory Keepers WRRING12-60907 Classic Leather 3 - Ring Album 12 x 12 in. - Orange Soda


I don't want to repeat much, if anything in our annual Project Life albums. It will showcase a lot of artwork, classroom photos, school pictures, school activities and maybe the key extracurriculars they did that year. I plan on coming up with a recipe for what to include each year, including a rough layout template and repeat that from pre-Kindergarten up through high school.


School Albums Blog Series: www.paintedladiesjournal.com


Today's blog post is about organizing the pieces throughout the year, so that when that school year is complete you are ready to put it together. Maybe you are more like me and have a few (or all) years to do. Artwork is a big part of it. I am photographing it so that I can incorporate it into a 12x12 album easily.

School Albums Blog Series: www.paintedladiesjournal.com

When something comes home that I think I might want to include, I add the date somewhere on the back or even the front lower corner, along with a name. I will weed stuff down at the end of the school year, but try to collect the stellar stuff that tells a little about their year.

School Albums Blog Series: www.paintedladiesjournal.com

I keep everything that I can in a filing cabinet. Each kid gets a folder per school year. I file report cards, writing samples, artwork that fits, school pictures, certificates, etc. 
I love my HON filing cabinet. It's deeper for under a desk, but I have it in our closet.
HON 312PP 310 Series 26-1/2-Inch 2-Drawer Full-Suspension Letter File, Black


School Albums Blog Series: www.paintedladiesjournal.com


I put oversized art pieces together near the filing cabinet.
So, it's the end of the year (or anytime if you are playing catch-up). Most everything I will use needs to be digitized. 


School Albums Blog Series: www.paintedladiesjournal.com
One approach is to start with your current year with the most recent memories, and then work backwards. Typically, I would go with that approach, but I was really anxious to free up space in the filing cabinet, so I'm starting with my oldest's first year of Pre-Kindergarten (3-year-old Preschool). I grabbed that hanging file and got to work.
Hanging Files:
Pendaflex Ready-Tab Extra-Capacity Reinforced Hanging Folders with Lift Tab Technology, Legal Size, 6-Tab, 20 per Box, Assorted Colors (42702EE)
Label Maker:
Brother P-touch PTD400AD Label Maker With AC Adapter


School Albums Blog Series: www.paintedladiesjournal.com
I like to use a clean white canvas as a backdrop and lay the piece on top and shoot from above. 

White Canvas:

Find a spot near a window for good natural, indirect light. Mid-morning or afternoon are typically best for me, but you will need to take note when that is in your part of the world. Make sure to hold the camera or your phone parallel above your subject. If you do not have access to good daylight hours and want to get this project done, say after kids are in bed, I suggest investing in a lightbox. Go here for a review I previously did on the Shotbox. There are also plenty of tutorials out there on how to make one.


School Albums Blog Series: www.paintedladiesjournal.com

I have also tried non-daylight photographing with an app called PhotoScan (a free app by Google). It will remove glare for any lighting and align artwork nicely, cropping to just the artwork. I ended up using this app even with my natural light photographing and really liked the ability to rotate and crop right to the edges within the app. It takes a little longer than just snapping a photo, but it will save me time cropping.

School Albums Blog Series: www.paintedladiesjournal.com
Here are two screenshots from my phone within the Photoscan App. Here is the feature that makes it great for photographing artwork. The top image shows the options to rotate on the bottom left and "Adjust Corners" in the bottom center. If you select Adjust Corners, you see what is shown in the bottom image above. Four connected dots appear that you can move around to your liking. 


School Albums Blog Series: www.paintedladiesjournal.com


When you select one corner, a zoomed-in image pops up so you can pick the exact corner if that is best for the image.


School Albums Blog Series: www.paintedladiesjournal.com
You can photoscan and adjust a batch in the app and then "Save All". It will save to your camera roll and Google Photos.

Now we are all set up to start creating a format for getting these school albums done. I'll be back with Part 2 of this series soon! If you want to dive in, I suggest these products from Amber LaBau Designs: