
When I was first started out digiscrapping - one of my biggest challenges was photo editing. Although I was not (and still not) a crazy perfectionist - I really wanted to highlight my memories the best way possible with the best images possible. Up on Amber LaBau's blog today I am highlighting some useful tools for photo editing.
There are so many parts and pieces (at least for me..) about teaching yourself Adobe Photoshop (or Photoshop Elements in my case) that not every aspect could be mastered at the same time! I already talked about some of my tips and tricks about shadowing in this blog post. After I was able to master the basics and shadow my elements using styles, the next big step was improving my photo editing! On my phone there are many tools for basic editing and even advanced editing - but I did not have a good handle on how to stream line my process on my PC.
There are so many parts and pieces (at least for me..) about teaching yourself Adobe Photoshop (or Photoshop Elements in my case) that not every aspect could be mastered at the same time! I already talked about some of my tips and tricks about shadowing in this blog post. After I was able to master the basics and shadow my elements using styles, the next big step was improving my photo editing! On my phone there are many tools for basic editing and even advanced editing - but I did not have a good handle on how to stream line my process on my PC.
I do use both my iPhone 6S+ (soon to be upgraded... to the amazing iPhone 7+ with its portrait mode) and a Canon 60D (mostly with my kit lens). I take lots of photos - especially on vacations (even work trips to new cities) so the quality is usually fair to ok to start with but I know that the right editing can really improve the quality!
One of the first tools I heard about is RadLab. Its developed by Totally Rad which has lots of options for photo editing for PSE, Photoshop and Lightroom. I like the fact that there are products from the same family as you grow in your skills. in addition - there is an iPhone option called PicTapGo which has nearly all the same functionality as Rad Lab (and is embedded in Becky Higgins Project Life app!. Unfortunately RadLab abandoned development on an Android version of RadLab. There are however lots of good options for Android included on this blog post including using Camera+ which also has great editing options.
Just to be clear, I am not getting paid by Totally Rad, this is just based on my great experience using their products for photo editing on both my PC and iPhone. Even better, they offer a 30 day trial so that you can figure out if this product is the right option for you. Even in PSE there are ways to batch process images...with even more options of course in full Photoshop! To be honest one of my to-do items this year is to learn that batch process thing...
Once you purchase the program (which is not cheap, but is often on sale.. make sure to sign up for their newsletter) you download it to a place you can easily access. It is available for both MAC and PC. Once you have it installed (instructions on their website are easy to follow) you can access through the filter menu. Here are some pictures from our trip to Ireland - at the Guinness Storehouse Gravity Bar, the wild western coast and from our pizza making class close to our house.
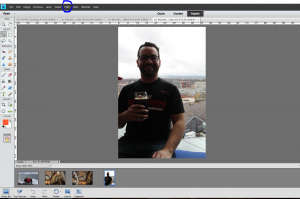
Once you install RadLab you will find it under the Filter options. I am using PSE11 but I know the newer versions will still be located in the same location.

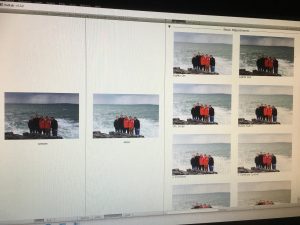
Once you open your image with RadLad - you will get all the style options

You can see all the options for the different styles that RadLab has built into the program. You can layer more than one option onto your photo to get the right adjustments. And you can keep layering until you are happy with your results. There are also some fantastic black and white options as well - and so much better than the built in options that are found in PSE.
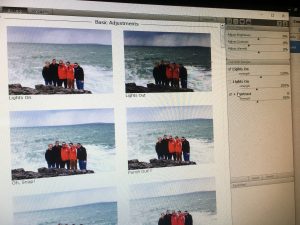
As you can see below, on an even finer level of detail - there are sliders for each filter or adjustment layer you add to your photo along with basic edits for Brightness, Contrast and Warmth. My example here is a photo taken in some gloomy & darkening sky conditions. You can also save your favorite recipes to simply edit with one tap! That is a huge time saver especially when you are editing photos from a big event since the conditions will be very similar from that event.
Here is the after with 2 layers of photo edits - and you can view all your progress right on the screen. You can do a split image, or a side by side comparison. There are ways to further tweak the image but I am fairly happy with the results - especially the big improvements from the original photo.
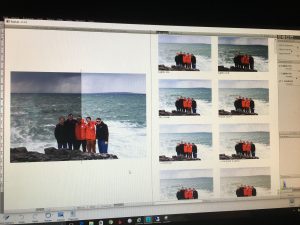

Here is the final comparison with the adjustments - in a split screen. Colors are more vibrant but still very nice contrast and detail.
And all the skills you learn from you PC/MAC can be easily transferred to your iPhone by using PicTapGo with all the same functionality. Here it is in the App Store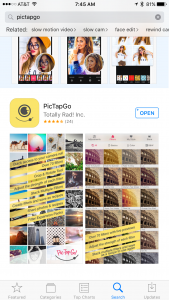
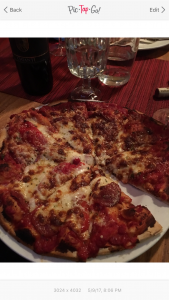
Here is a how a image opens on my iPhone - my husband and I took a cooking class last week on Pizza making - so of course I took a photo of the final product - yum!! While the pizza was yummy the color was too dark and uninspiring.
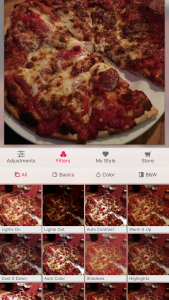
After you select the image you see the numerous filter options - just the same as the PC version with all the color and black & white options. You don't have the split screen options but you can switch back and forth with the back button easily & the slider is curved right below the picture. You can also save your "recipe" to use on lots of other photos from the same event or ones you normally take in the same place.

A couple of quick edits and much more appetizing!
Hope this overview on one useful tool that helps make photo editing simpler, Rad Lab (for PC/MAC) and PicTapGo (on the iPhone), which can really make a difference in your work flow. If you have any further questions or need any some more direction/tutorials please let me know and I would be happy to help out!

No comments:
Post a Comment