With "Week in the Life" (by Ali Edwards) just happening last week, I thought I'd share a few ways that I print for this type of hybrid project. I use a combination of pocket pages and full size 6x8. Therefore, I mainly print 4x6, 6x8 or (2) 3x4's on a 4x6 for this project. I split this post into two parts to share two different ways to create and print (2) 3x4's on a 4x6 at home. I have a Canon Pixma printer, iPhone 7 and Windows 10 Laptop. I think most of this tutorial can be applied to any device, but keep that in mind.
PART ONE: CREATING THE PROJECT LIFE APP
There is something to be said about prepping hybrid pieces on your phone. It can be done little by little, when you have time, ANYWHERE. (If you just don't like working on your phone like this, I suggest www.picmonkey.com or Photoshop/PSE to do this step) So, let's look at the PL App for setting yourself up to print 2-3x4's on a 4x6. These can be journal cards or photos. I like to print journal cards on matte photo paper or cardstock and photos on semi-glossy or glossy photo paper. For this reason, I always group either 2 journal cards or 2 photos together.
Here's the first screen, when you open the Project Life App. Pick the upper left picture.
Now you see this screen, and you are ready to pick your photos or journal cards. Save what cards (and photos, if they aren't on your phone already) that you want to use to Dropbox ahead of using this app and you will be able to access them.
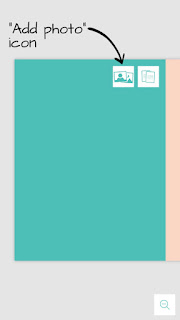
Whether you are wanting to print cards or photos, when you are accessing from Dropbox, you will select the "add photo" icon.
On this screen, scroll down toward the bottom to find the Dropbox option. Then, find your cards and photos you saved. If you want to add typed journaling before printing, you will not be able to in Project Life because it thinks you brought in a photo. But, you could bring it into another app like LetterGlow or Over (Luly talked about this in her post on App Scrapping).
So, I've brought in two photos for my WITL project that I want to print as 3x4 photos. One with journaling that I typed in the app, Letterglow, before bringing in here. Select the bottom right icon and then select "Export".
You can export it to a number of places. If you are printing from your phone, just save it to your camera roll by selecting "export" and then "Save Image", shown above. If you are printing from your computer, you can save back to Dropbox OR "Save Image" and import from your phone's camera roll.
Now, you are ready to print! I like to buy the canon 4x6 papers for printing at home on my Canon printer. Go here to see links to products I use. I prefer to print from my laptop because I have more control, but have printed plenty from my phone! I did a more detailed post on printing from your phone here.
PART TWO: CREATING & PRINTING WITH THE CANON PHOTO SOFTWARE
I use a Canon Printer and have the Canon - Easy Photo Print EX software installed on my laptop. I really like that I can create 2 3x4's on a 4x6 right in the software. One less step! It is great for photo printing. The following is a quick peek at how it works. I like to use the Letterglow or Phonto App to write on top of any photos that will get journaling before printing. One tip: keep track of what scale or size your font is, so that you can be consistent throughout the project.
Upon opening the software, you will see this screen. Select "Photo Print"
There is a panel of buttons on the left-hand side that you basically go through one at a time in order. Hit the "Select Images" button as shown above, then find the photos on your computer. Pick two photos, or any multiple of two if you are printing several at once.
Next, hit the "Select Paper" button on the left side. Select the 4x6 and correct type of paper (I suggest glossy for photos and matte for journal cards).
Here's the neat part. You select the option for "x2", or 2 photos on one page. You can rotate each panel, if needed. You can select borderless or with borders. I like borders!
One last thing to check. Under Preferences, you want to check that the "Amount of Extension" is set to NONE.
Here's a few of my prints. I'm using some of Amber LaBau's "Project 52 2016 Edition" in the Project Life App. They are kinda PERFECT for this project. Day of the week cards! When creating images from different platforms (for instance, I'm using both the PL App and Letterglow), do a couple of test prints of images to compare font size before going crazy and creating all your images for your project!
If you are not using photo printing software, the best tip I can give for printing at home when you want to print (2) 3x4's (this also applies if you want white borders) is to make sure you have selected Borderless Printing and then you want zero extension. Most printer have something called "amount of extension". On Canon, it's under Page Setup and it's a slider bar I pull all the way to the left. Otherwise, it will zoom in and cut off a little bit of photo. This is the default setting. Make sure your 4x6 paper is lined up in the machine well and print!
Thanks for joining me today!
Holly Genc
Products I like for this hybrid project:


LetterGlow - Graphic Design & Photo Editing - The Lens Lab Pty Ltd

PicTapGo - Totally Rad! Inc.
Phonto - Text on Photos - youthhr


No comments:
Post a Comment