Showing posts with label mini album. Show all posts

Monday, October 31, 2016

Halloween Hybrid Mini-Book

HAPPY HALLOWEEN!! I made this fun little hybrid mini-book using Amber LaBau's Thirty-One collection (collaboration with Sara Gleason), earlier this week. I'm so excited to share with you how easy this is for anyone to do.

Halloween Hybrid Mini-Book using "Thirty-One" by Amber LaBau Designs & Sara Gleason. Created by Holly www.paintedladiesjournal.com
I chose to make mine a 4x6 book. The first thing I did was pick out which Thirty-One papers that I wanted to use. Then, I cropped them to 4x6, so the patterns would be the right scale. 

"Thirty-One" by Amber LaBau Designs & Sara Gleason

I laid them out on an 8.5" x 11 canvas in Photoshop Elements (my software of choice). I added some of the word strips and other elements that would be easy to cut out by hand to the extra room left over. 

Halloween Hybrid Mini-Book using "Thirty-One" by Amber LaBau Designs & Sara Gleason. Created by Holly www.paintedladiesjournal.com

I glued my 4x6 papers back to back to make the pages. One tip: First create your layout and then glue them together, being careful nothing is upside down as you flip pages. This way, if you want to use your tiny attacher, your staples are hidden on the inside. 

Halloween Hybrid Mini-Book using "Thirty-One" by Amber LaBau Designs & Sara Gleason. Created by Holly www.paintedladiesjournal.com

I used my Canon Pixma and Silhouette to print-n-cut most of the elements I used on these pages.  I like to use the PicStitch App to create 4x6 photo collages with white borders to cut down for these smaller pages.

Halloween Hybrid Mini-Book using "Thirty-One" by Amber LaBau Designs & Sara Gleason. Created by Holly www.paintedladiesjournal.com

Once I had all the pieces, this album went together very quickly. And it was so fun to do! The pages go together easily when you have a coordinated kit like this. That little black cat card (love!!) is from the Thirty-One Cards, which I scaled down a little to fit better on my 4x6 album.

Halloween Hybrid Mini-Book using "Thirty-One" by Amber LaBau Designs & Sara Gleason. Created by Holly www.paintedladiesjournal.com

I added some black stickles on top of the BOO letters to give it a little more sparkle. The ghosts were from the Thirty-One Elements & Paper Pack. These are my favorite! I put a bunch on an 8.5"x11" canvas in PSE (Photoshop Elements), flipping some so they would be flowing in both directions. Then, I printed them on vellum. I hand cut these. The Silhouette can cut vellum, but I believe you need special vellum made by Silhouette.

Halloween Hybrid Mini-Book using "Thirty-One" by Amber LaBau Designs & Sara Gleason. Created by Holly www.paintedladiesjournal.com

Last page! I plan to add a few pages from past and present to show the different costumes over the years. Hope everyone has a fun and safe Halloween!

Holly Genc www.paintedladiesjournal.com
Instagram | Facebook | Pinterest

I've listed a few affiliate links to supplies I like to use below:

My favorite apps for editing photos and creating 3x4 collages:

PICTAPGO for editing. The lighten is awesome on any photo.
PicTapGo - Totally Rad! Inc.

PICSTITCH (paid version is needed to create thicker white borders - so worth it) for collages.
Pic Stitch - #1 Photo and Video Collage Maker - Big Blue Clip, LLC


  CANON MG7520 Wireless Color Cloud Printer with Scanner and Copier, White (Discontinued By Manufacturer)


  Canon Photo Paper Plus Glossy II, 4 x 6 Inches, 400 Sheets (2311B031)


Canon Photo Paper Matte, 8.5 x 11 (50 sheets) - I used this to print my papers and elements on the Pixma Printer listed above. I love the quality!


Tim Holtz Tiny Attacher


Black & White Grosgrain Ribbon (so versatile!)


Metal Book Rings for binding your mini-books. These are 2".

Towbow Permanent Tape Runners - These are the ones I use. Be sure to use permanent tape in a book like this. Also, you need to apply liberally along each edge.


Sunday, December 13, 2015

Documenting December - Week 1: An Evolving Process

I'm knee deep into my first December Daily project! With what turned out to be a super busy week (that's probably lots of us!), my original plan to show a bunch of completed pages got squashed. But, I'm so excited to share a little on my process! I love these kind of blog posts. 
  
So, if you follow me, you saw a post a couple weeks ago on my December Daily Prep and ideas on what to set up ahead of time for this type of album. Go here, if you'd like to see that! 
 
 
As our days of December are flying by, I've been taking a few steps to keep on track. With littles under foot, I just can't have my stuff sitting out all the time! 
 Holly | Take10Kits   www.thestudio29designs.com 
The most important thing I feel I do, is the journalling every day. I have been using the Project Life App for that. In some cases, I just printed that card out, as is! I bought the Merry & Bright kit in the app. Whether or not, I plan to print the app cards, I still record it there to start!
 
In some cases, I know I want to add my journaling onto one of my foundation pages, directly. I have been keeping an ongoing word document for those using text boxes in the sizes I need. 
 Holly | Take10Kits   www.thestudio29designs.com 
I found a "new" product that I think has become my new favorite. They are sturdy little hole punched tabs that can be added to almost anything and stuck in your binder! Above, you are looking at the back side of a journaled print out from the Project Life App. It became a 4x6 vertical insert. I just added a couple of small photos to the back with strip journaling.
  
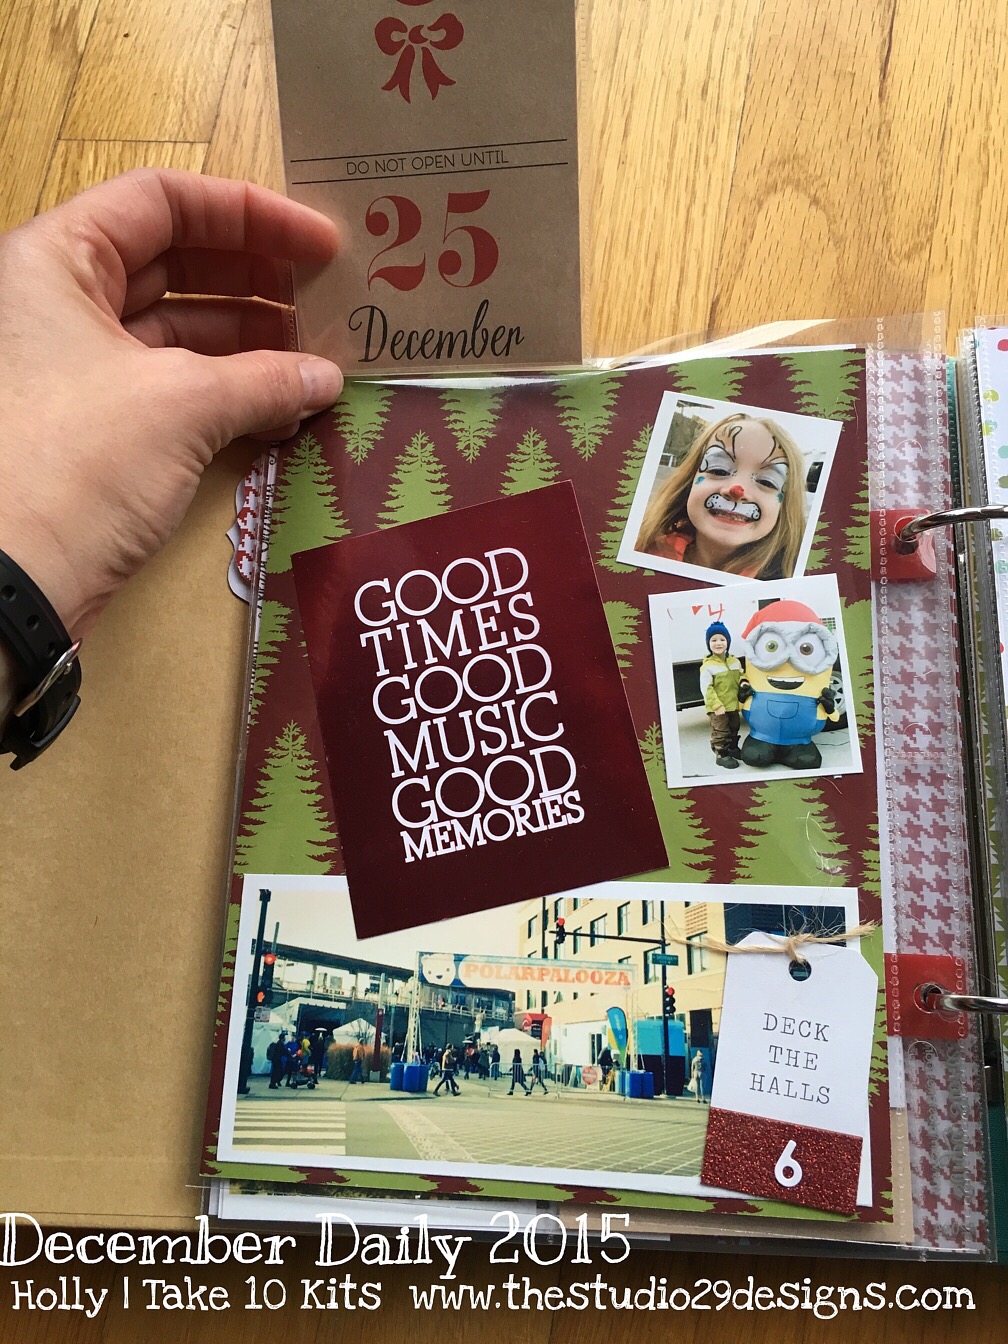
So here is a work in progress of my Day 3. I chose to print a 5x7 of a fave photo from that day to go on my 6x8 full page. I need to still come back and do more with that! It's ok to leave a few things. I'll tell you why. I have 3 chipboard index pages that came with the Simple Stories binder. When, I did the DD Prep, I cut down my coordinated papers to match these tabbed chipboard pages but didn't glue anything together so that I'd have some design flexibility later. Here we are, and I'm still not gluing. For efficiency, I'll do all three (six sides total!) of those types of pages together. It requires the same tools (hodge podge and foam paintbrush). When, you don't have a dedicated scraproom, your brain comes up with different approaches! LOL.
 Holly | Take10Kits   www.thestudio29designs.com 
Only half of Day 4! But, notice, the journalling is done! Won't have to remember or lose the details. So, here, you also notice another part of my process. I've been using the Picstitch App for my photos. This one was a simple 4 pics on a 4x6. In some cases, I cut photos apart, too.
  
Here's a screenshot of Picstitch. You have to visualize a little bit with this app, but once you start using it, that gets easier. It shows the layout choices as square, but you can change the aspect ratio to 4x6. So that highlighted one above  becomes  6 2x2 square photos (see below).
 
  IF you are going to cut your collage apart, I like to beef up the borders! To get this feature (shown above), you do have to get the paid version of this app. I think it's worth it, IF you are a "bordered photo person." I have no affiliation with PicStitch, by the way! 
A little bit of photo management can go a long way with this project. As the week went on, some activities produced tons of photos. I would "favorite" photos I thought I'd use, so the selection process was done! 
I'm going to give you a suggestion that I did not do the first week, but plan to do starting now! Take photos of your foundation pages for referring to throughout the week. I do not physically put it all together every day, but I'm journalling, editing photos and printing stuff! Knowing what foundation pages that I have for each day would make it more efficient. For me, this will be great because I do a lot of prep on my phone that is with me wherever I go.
 Holly | Take10Kits   www.thestudio29designs.com
Another example of those little attachers, used on a vertical 4x6 journal card created in the Project Life App.  Love this genius product (hop over to my blog post, if you'd like links to some of this kind of stuff).
 Holly | Take10Kits   www.thestudio29designs.com Notice that I left a bit of space at the top of my journaling so that I could add a title. By the way, the black chipboard letters were a recent Target HotSpot find!!
Holly | Take10Kits   www.thestudio29designs.com 
Backside of the Tree Farm journalling. It's another PicStitch photo. I added the "JOY" sticker from the Heidi Swapp collection included in the Take 10 Kit.
 Holly | Take10Kits   www.thestudio29designs.com 
Here's another 5x7 placed on one of the Take 10 Kits' 6x8 papers. Love the plaid. Those tree and "Christmas" embellishments were made during my prep work with the Take 10 Kits Days of December stamp set, which is still available! AND, by the way, the Days of December pocket kit including 6x8 papers is still in the shop, too. These are exclusive to Take 10 Kits!
Holly | Take10Kits   www.thestudio29designs.com 
 Holly | Take10Kits   www.thestudio29designs.com 
Another new-to-me product that I'm digging is on this spread! And here are some of those smaller photos cut apart from collages made in PicStitch.
 Holly | Take10Kits   www.thestudio29designs.com Here's a closer look. That upper left PL App 3x4 journal card is in a 3x4 self-adhering flip-up! 
 Holly | Take10Kits   www.thestudio29designs.com 
I stuck it right on top of the 6x8 page protector. It was forgiving! I didn't quite get it started as straight as I'd like, and was able to peel it back off (gently) and re-align. This was to fun to use and useful! 
Holly | Take10Kits   www.thestudio29designs.com 
There's index divider number two that will require some more work. Saving it until all three are ready to go! And I had to have the "bokeh" tree shot. Check that off the list.
This December Daily album is a lot of fun and has inspired me to make sure we make time for lots of special holiday memories.
Affiliate links for the products in this post:
BasicGrey Attach Me Stickers, Emerald/Seafoam (lots of color options)

Holly Genc. Like us on Facebook! Follow us on IG!

Sunday, November 22, 2015

December Daily Preparations

I might be a wee bit excited to actually be doing a December Daily album this year. I even have looked up several of our city's holiday events to mark them on the calendar. We already did one holiday tradition last weekend (making pierogi with the Polish side for Christmas Eve) and this Saturday, we plan on attending the Light Festival Parade downtown, where they ceremoniously light all the trees lining Michigan Avenue. 
Holly | Take 10 Kits    www.thestudio29designs.com 
I'm going to show you what I have already set up to make this album go smoothly and get done! I knew I was going to be using the Take 10 DD sets and I wanted to do a 6x8 size album. I picked the Sn@p Simple Stories Teal album. As you can see, I haven't figured out the cover yet, so stay tuned! 
I am mainly using the kits but am supplementing with a few more items I purchased and some stuff from my stash. I ordered the Heidi Swapp Holiday Marquee papers that match her "Oh What Fun" collection, which is part of the Take 10 DD sets! I wanted these because they are larger than 6x8 and go great with the kit! Note, they are thinner single-sided papers. I'll show you what I did about that in a bit.
First, I started loosely laying out a 2-page spread per day or memory, with lots of blank space for photos. I have a mix of Simple Stories and Becky Higgins, LLC 6x8 page protectors. They are the very close to the same size, but you need to punch new holes in the BH pages. 
 Holly | Take 10 Kits    www.thestudio29designs.com 
Then, I started mixing and matching numbers 1-25. Fun! I wanted a eclectic feel, still sticking with the same color palette. I pulled out my Sticker stash in coordinating colors, and used the Take 10 Days of December Numbers Stamps, get them here.
 Holly | Take 10 Kits    www.thestudio29designs.com 
I put that lovely 6x8 calendar page right up front. It will probably not be done until the end, after I know what we did when! Below are a few more peeks at the foundation pages. 
Holly | Take 10 Kits    www.thestudio29designs.com  
Holly | Take 10 Kits    www.thestudio29designs.com 
 Holly | Take 10 Kits    www.thestudio29designs.com  
Holly | Take 10 Kits    www.thestudio29designs.com 

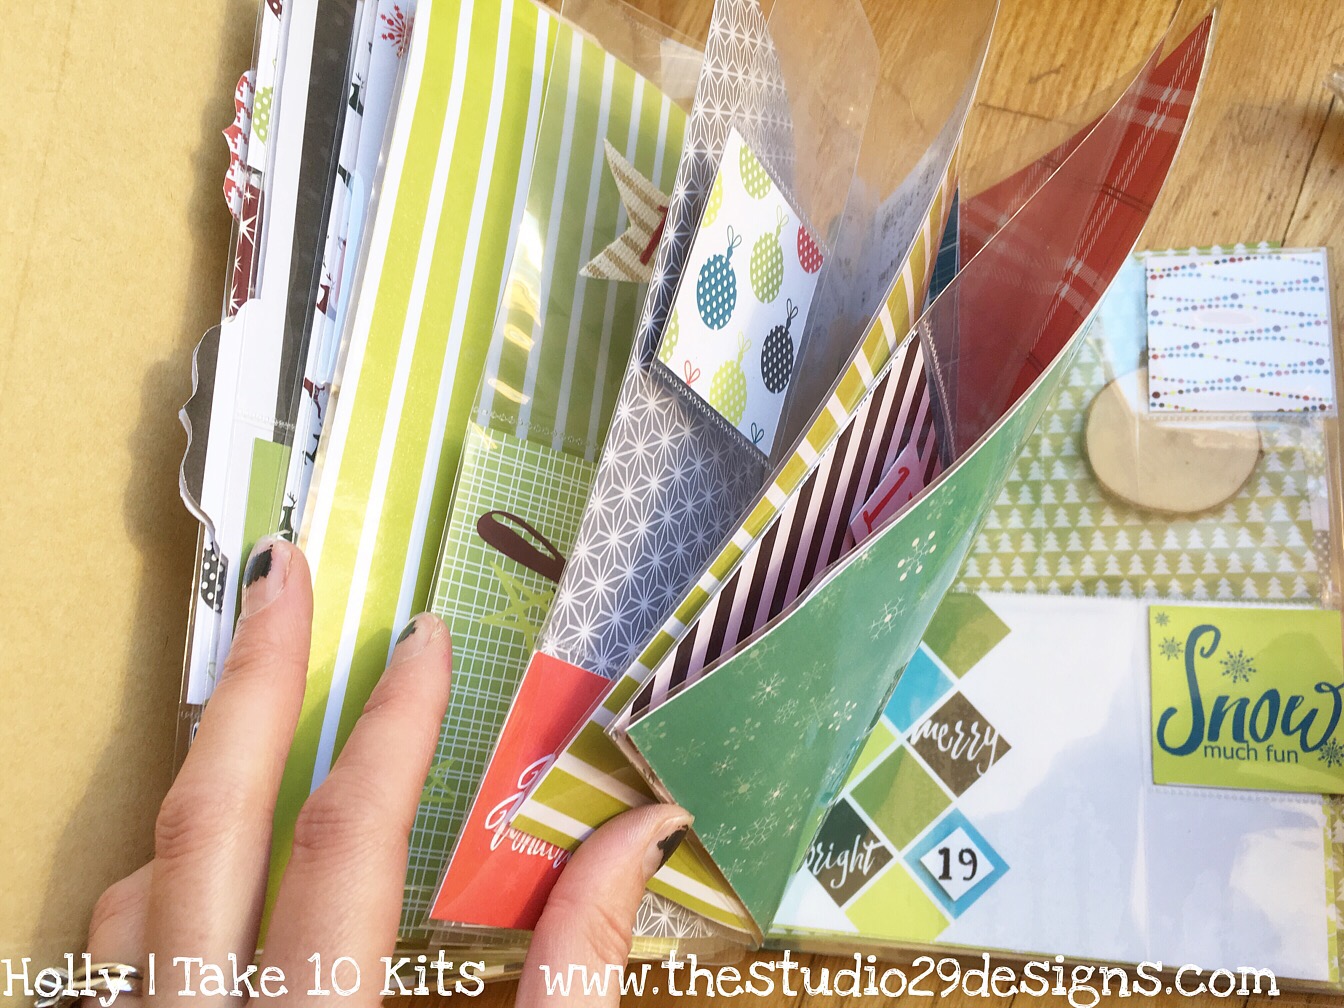
And that last photo shows what I did with those single-sided papers. I cut two to the full size of the page protectors, glued them together and then ran them through my laminator. I also cut them down to glue to the chipboard tabbed dividers that came with the Sn@p album.
 Holly | Take 10 Kits    www.thestudio29designs.com 
Next up, I got to work with the Days of December stamp set (here), making little embellishments to add later. Yes, I did a bunch of fussy cutting!
 Holly | Take 10 Kits    www.thestudio29designs.com
When I got to that "Believe" stamp, I really wanted it to be gold. I figured out how to get that with what I had on hand. Yellow mustard ink and Sticklers in "Crystal"  worked quite well.
Holly | Take 10 Kits    www.thestudio29designs.com 
 Holly | Take 10 Kits    www.thestudio29designs.com
 Holly | Take 10 Kits    www.thestudio29designs.com
 I played around with the snowflake stamp and Liquid Pearls to make a custom card. 
 Holly | Take 10 Kits    www.thestudio29designs.com
 And now, I have a bin full of coordinated items ready to pretty up my DD album, as I go. Are you doing anything to prep for a DD album? Let me know your tips!!
Here is a list of most of what I am using. Some of these links are affiliate links. (Thanks for your support!) I only link items I use and love! (click directly on image)
This is the Snap 6x8 album in teal that I am using.

If you didn't get the Take 10 Days of December Add on, the following items were from that:
     Heidi Swapp Oh What Fun Glitter Tags (18 pcs)

  HS Oh What Fun Clear Stickers (69 pcs)

HS Oh What Fun Alpha Glitter Stickers (includes Gold, Green and Red 192 pcs)

  Shimelle Tinsel Bows (8 pcs) 


   Pink Paislee Yuletide Gold Foil Words 
Pink Paislee Yuletide enamel shapes, Glitter Gold (17 pcs) 
  Pink Paislee Tree Clips, Gold (6 pcs)
Simple Stories Claus & Co Enamel Dots (60 pcs)
And here are more items I used:
Pink Paislee Merry & Bright Tags (note: the white is not as "bright" as pictured)
  Pop Dots
Xryon Sticker-Maker, Laminator, Magnet (many great uses)
Ranger Liquid Pearls, White Opal  Ranger Stickles, Crystal
I also pulled some cards from various Me & My Big Ideas Pocket Page Card Sets that I have. Here are some of the sets that I pulled from:
        MAMBI Months of the Year  Follow Your Heart
MAMBI Today                 This is My Life

Heidi Swapp Christmas Patterned Paper is back in stock. yay. love this paper. It's 8.5x8.5, so it's great for divider pages or full 6x8 pages. And, it goes perfectly with Take 10 Kit's Days of December kits.  

And here are all the TAKE 10 KIT links in one place that I reference in this post:
Days of December Numbers Stamps
Days of December Kit
Follow us on IG!
Thanks!