Showing posts with label hybrid scrapbooking. Show all posts

Monday, July 31, 2017

School Albums - Part 2: Making a Plan

I'm back with my next step in getting School Albums started. If you are anything like me, you have stacks of school memorabilia in bags or boxes in your closet and just need a system for starting! I did the first post on organizing and photographing artwork in June. Find it here.
Holly | www.paintedladiesjournal.com

Now, we get to the fun part, making a plan for all this stuff. I really like the idea of creating a design that includes everything I want to see in a school year and then repeating it, each year. Today's post included the first page, front and back. I chose to use pocket-style pages. They will be mostly hybrid, but some may be full 12x12 prints of layouts, as well. This all stemmed around the fact that I had been buying an 8x10 school picture and 8x10 class picture each year starting in pre-kindergarten. I really wanted to stick with 12x12 page layouts, and not add in an 8x10 insert for those. I wanted them to be part of the pocket page layouts.

Holly | www.paintedladiesjournal.com

Enter Stage Right: The Fuse Tool. I kept thinking about it and would it be worth it, creating custom pocket pages to make my idea work? I loved the idea too much not to try it. I played around in Photoshop Elements to see what kind of two-sided pocket page would work well and then got to it.
Holly | www.paintedladiesjournal.com

I watched some Youtube videos to get some tips for my first trial with the Fuse. I decided to also invest in the glass cutting mat and a longer metal ruler since I would be working with full 12x12 protectors. (Note: I bought a 12" ruler, but I suggest getting a 15" ruler) I inserted an 8x10 photo into the protector and positioned it where I wanted it, then fused a pocket around it. From there, I continued to complete my pocket page design. (HINT: When printing your other cards, measure the pocket and adjust your card size)


Holly | www.paintedladiesjournal.com

This two-sided page will be my first page each year. Here is the front. It has the 8x10 portrait school photo. I made a little title card to go in the bottom skinny pocket that showcases the grade and teacher's name.

Holly | www.paintedladiesjournal.com


I used a "Wonderful You" paper for a background to put the 2nd Grade title on, which is from "Through the Years." The teacher's name is spelled out with the "Blackboard Alpha". I chose to make a 4x6 card with photos of her two main teachers this school year in the upper pocket, again using "Wonderful You" paper and elements.

Holly | www.paintedladiesjournal.com
The bottom, right pocket is a "Wonderful You" pocket card that had lots of fun info to fill in about the school year.

Holly | www.paintedladiesjournal.com


I had to make a decision to be ok with the back page being read sideways. This type of thing typically bugs me, but I loved the custom pocket page idea so much that I got past this. So, the landscape class photo backs up to the school photo and here, I put in a "first day of school" picture, along with another card from "Wonderful You" that I will have Audrey fill out (now, because she just finished this grade!).

I'm pleased with this set up and plan to repeat it for each year for each child. Hope this gave you some ideas! I will be back soon with more progress on this album set-up. We have to do something with all those photos of school memorabilia that we took.

Here are a few affiliate shopping links to the items I have used in this project. Affiliate links do not cost the buyer anything more and send a few cents to the blog. Thanks!
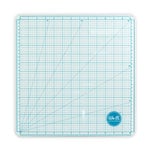


We R Memory Keepers - Precision Glass Cutting Mat
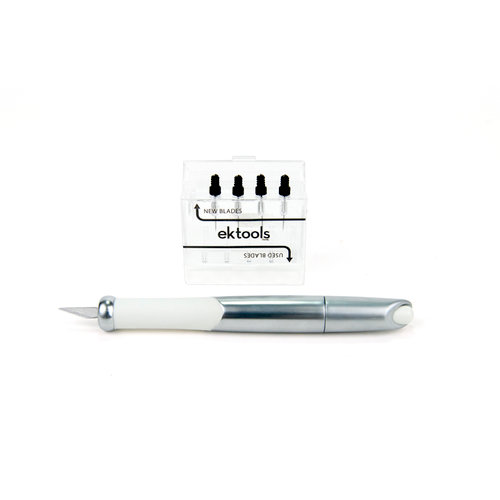
EK Success - EK Tools - Retractable Knife and Blades

 
15" Metal Ruler (click on picture above)


12x12 3-ring Page Protectors

Thursday, April 27, 2017

Creating & Printing Two 3x4's on a 4x6 for Hybrid Projects

I created this post for the Amber LaBau Blog first, and it can be found here. My version here includes some shopping links at the bottom, sharing apps and products that I like to use for this process I am sharing today. Some are affiliate links.


Holly | www.paintedladiesjournal.com
With "Week in the Life" (by Ali Edwards)  just happening last week, I thought I'd share a few ways that I print for this type of hybrid project. I use a combination of pocket pages and full size 6x8. Therefore, I mainly print 4x6, 6x8 or (2) 3x4's on a 4x6 for this project. I split this post into two parts to share two different ways to create and print (2) 3x4's on a 4x6 at home. I have a Canon Pixma printer, iPhone 7 and Windows 10 Laptop. I think most of this tutorial can be applied to any device, but keep that in mind.

PART ONE: CREATING THE PROJECT LIFE APP

There is something to be said about prepping hybrid pieces on your phone. It can be done little by little, when you have time, ANYWHERE. (If you just don't like working on your phone like this, I suggest www.picmonkey.com  or Photoshop/PSE to do this step) So, let's look at the PL App for setting yourself up to print 2-3x4's on a 4x6. These can be journal cards or photos. I like to print journal cards on matte photo paper or cardstock and photos on semi-glossy or glossy photo paper. For this reason, I always group either 2 journal cards or 2 photos together.

Holly | www.paintedladiesjournal.com

Here's the first screen, when you open the Project Life App. Pick the upper left picture.

Holly | www.paintedladiesjournal.com

Now you see this screen, and you are ready to pick your photos or journal cards. Save what cards (and photos, if they aren't on your phone already) that you want to use to Dropbox ahead of using this app and you will be able to access them.

Holly | www.paintedladiesjournal.com

Whether you are wanting to print cards or photos, when you are accessing from Dropbox, you will select the "add photo" icon.
Holly | www.paintedladiesjournal.com

On this screen, scroll down toward the bottom to find the Dropbox option. Then, find your cards and photos you saved. If you want to add typed journaling before printing, you will not be able to in Project Life because it thinks you brought in a photo. But, you could bring it into another app like LetterGlow or Over (Luly talked about this in her post on App Scrapping).

Holly | www.paintedladiesjournal.com
So, I've brought in two photos for my WITL project that I want to print as 3x4 photos. One with journaling that I typed in the app, Letterglow, before bringing in here. Select the bottom right icon and then select "Export".


Holly | www.paintedladiesjournal.com

You can export it to a number of places. If you are printing from your phone, just save it to your camera roll by selecting "export" and then "Save Image", shown above. If you are printing from your computer, you can save back to Dropbox OR "Save Image" and import from your phone's camera roll.

Now, you are ready to print! I like to buy the canon 4x6 papers for printing at home on my Canon printer. Go here to see links to products I use. I prefer to print from my laptop because I have more control, but have printed plenty from my phone! I did a more detailed post on printing from your phone here.

PART TWO: CREATING & PRINTING WITH THE CANON PHOTO SOFTWARE

I use a Canon Printer and have the Canon - Easy Photo Print EX software installed on my laptop. I really like that I can create 2 3x4's on a 4x6 right in the software. One less step! It is great for photo printing. The following is a quick peek at how it works. I like to use the Letterglow or Phonto App to write on top of any photos that will get journaling before printing. One tip: keep track of what scale or size your font is, so that you can be consistent throughout the project.
Holly | www.paintedladiesjournal.com

Upon opening the software, you will see this screen. Select "Photo Print"

Holly | www.paintedladiesjournal.com
There is a panel of buttons on the left-hand side that you basically go through one at a time in order. Hit the "Select Images" button as shown above, then find the photos on your computer. Pick two photos, or any multiple of two if you are printing several at once.
Holly | www.paintedladiesjournal.com

Next, hit the "Select Paper" button on the left side. Select the 4x6 and correct type of paper (I suggest glossy for photos and matte for journal cards).
Holly | www.paintedladiesjournal.com
Here's the neat part. You select the option for "x2", or 2 photos on one page. You can rotate each panel, if needed. You can select borderless or with borders. I like borders!

Holly | www.paintedladiesjournal.com

One last thing to check. Under Preferences, you want to check that the "Amount of Extension" is set to NONE.

Holly | www.paintedladiesjournal.com

Here's a few of my prints. I'm using some of Amber LaBau's "Project 52 2016 Edition" in the Project Life App. They are kinda PERFECT for this project. Day of the week cards! When creating images from different platforms (for instance, I'm using both the PL App and Letterglow), do a couple of test prints of images to compare font size before going crazy and creating all your images for your project!

If you are not using photo printing software, the best tip I can give for printing at home when you want to print (2) 3x4's (this also applies if you want white borders) is to make sure you have selected Borderless Printing and then you want zero extension. Most printer have something called "amount of extension". On Canon, it's under Page Setup and it's a slider bar I pull all the way to the left. Otherwise, it will zoom in and cut off a little bit of photo. This is the default setting. Make sure your 4x6 paper is lined up in the machine well and print!

Thanks for joining me today!
Holly Genc

Products I like for this hybrid project:


LetterGlow - Graphic Design & Photo Editing - The Lens Lab Pty Ltd


PicTapGo - Totally Rad! Inc.


Phonto - Text on Photos - youthhr