Showing posts with label #mexicocity. Show all posts

Friday, September 23, 2016

Project Life App roundup

I've been doing lots of catching up on my  Project Life for 2016 in the last week since Becky Higgins had a sale on her kits in the Project Life app. Don't know about the app, here is some additional
info on Becky's website. 

The app is the handheld version of Becky's Project Life memory keeping system. You can make it as complicated or as simple as you like. Daily, weekly, monthly or event scrapping. Whatever is the most important for you to document- this system can help you- and you can include lots of pictures or stories. 

I think part of the reason I've been so inspired is that I really took a look at some of the kits again with a fresh set of eyes. When the app updates come out- I somehow convince myself that I don't need that kit ... However at $.99, they were much easier to buy even for just a few cards that I love within a kit. 

I am nearly a 100% Digi scrapper so I already use lots of tools to make using the PL App easier. I use Dropbox and lots of phone editing tools on my phone and editing tools on my laptop/ computer. I even got an Eye-Fi card recently ( I am still learning about this great tool to allow DSLR photos transferred directly on your phone or computer) to make my process easier. 

I am fortunate to be on a few CT teams so I try to use photos that I want to scrap as part of my assignments, but that still leaves me with lots of photos and gaps in my documenting. I am not sweating a weekly format, but pretty much I end up with nearly a page or 2 a week.  

So back to my new love of the app. The most recent update allows you to directly edit your photos in PicTapGo, an app by RadLab. It has been LIFE CHANGING - I know it seems an extreme statement but I love the ease of not having to move in and out of the app to edit photos. Plus my biggest pet peeve is photos that are
croocked. You can fix that in PicTapGo too!! Wow!! Now you really can complete a page while riding in a taxi or waiting at the airport. ( and even finish a blog post!)

So let me get started on sharing some of my recent goodies. 

I often look at the primary photos I want to document and I pick a page protector from that. If I have few more pictures to include I use the collage function in the PL App to create a collage for one of the pockets. Her Design A and Project 52 2016 Edition by Amber LeBau with the Project 52 overlays. 

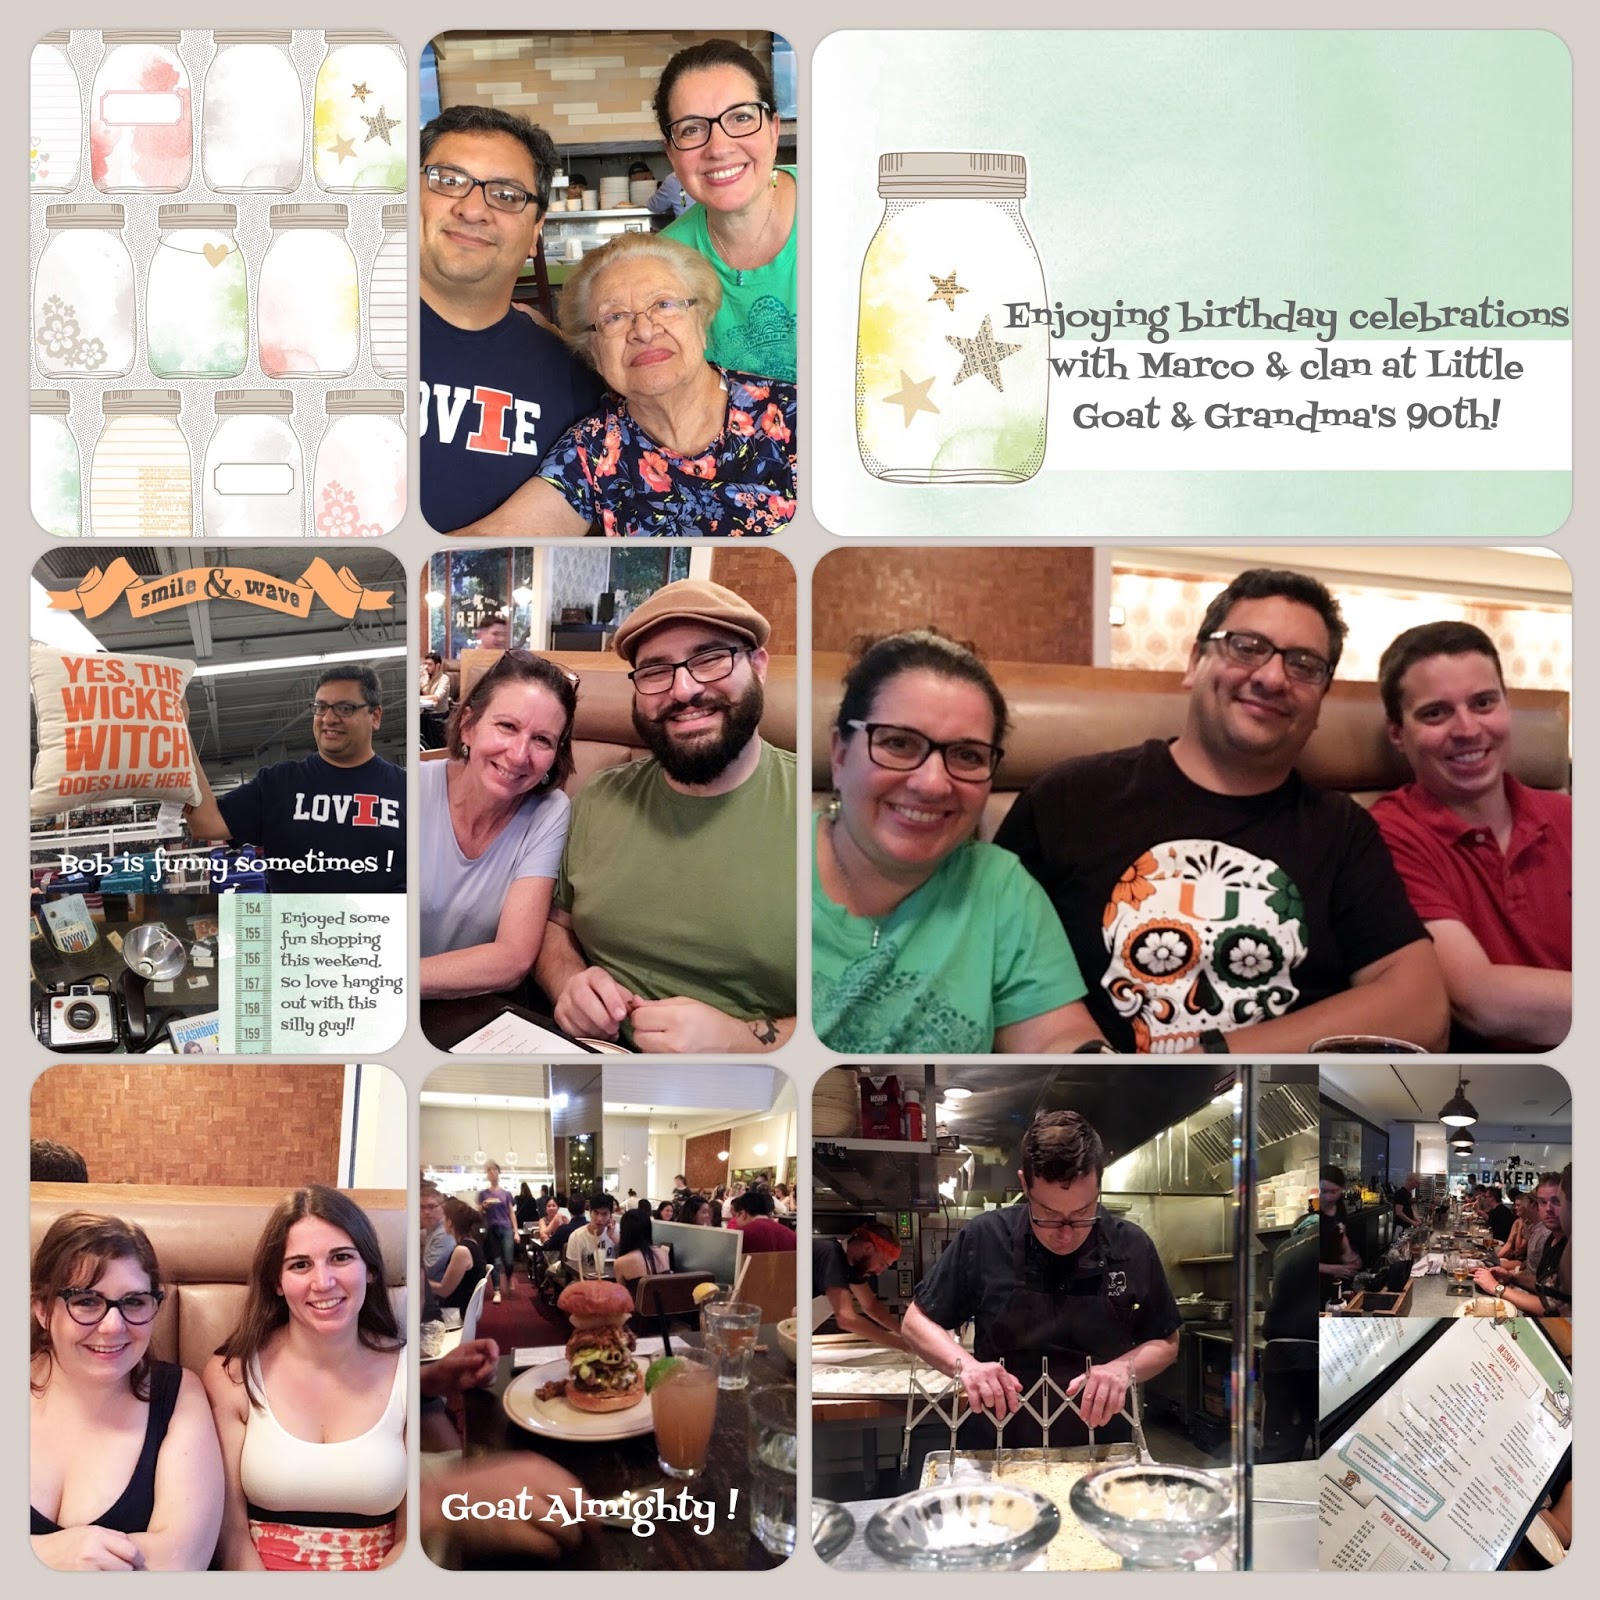
 Here is used Design A again but with a collage in the bottom left. To document our Scrapbook Expo day! Card kit is Currently edition by One Little Bird. 


I actually went out on a limb and combined 2 kits with another Design A, ha! Inspire has the beautiful watercolors and Everyday edition by Liz Tamanaha has great black and white cards! I used Phonto to add the curved text and the title with a white background for the title. 


Went back to an oldie but goodie using Cobalt edition cards and a photo collage. I used Photo here ( but you can use Rhona Designs and several others) to add text to your photos. One trick I use when the photo is too busy for my text to stand out is to use a very transparent grey box behind the text. All done in Phonto. 


Love this page using Design U with the doors of San de Allende, a beautiful colonial town near Mexico City. I used just one card from the DIY Shop value kit and some great elements from Rhona Designs to add just the right touch to this page.  So many great photos and I was able to tell the story of our trips on other pages so this one really just needed photos!


Here to document pages from my sons graduation I used Capture Life kit and Squared Away 13 template. This kit has some great square card options which not all kits do. However one trick I learned is starting with a standard size,  say Design A for example or using a larger spot on your current template, and then you can then move a 4x6 or 3x4 card to that slot. 
I also really liked how I was able to use my panoramic photo on both photo slots on the bottom of this template. 


The newest app update has blank solid colored cards which match each kit. There are so many possibilities! You can use it to add additional journaling right in the PL App or Phonto or Rhonna Designs if you have a different font that you want to use. One of my favorite things that I have done as a scrapper is to have my handwriting turned into a font. It's a great way to document yourself in a lasting way- especially when you are a Digi scrapper!

Another great option for these blank cards is as a base for all the cool graphics and word art that are available in apps like Over and LetterGlow. I love some of the options out there. Why not take advantage of all the great designs out there by professional graphic designers to add a little sumpthing sumpthing to finish off your page. 


I'll close this post up with a few more PL app page goodies to share! Hope you all have a great weekend - take lots of pics so that you can scrap them on your Phone!


Friday, July 22, 2016

Midori Mini Album Part II


Hi everyone, back again to share my second part of my mini album that I completed in my Midori travelers notebook insert. I was so excited about being able to capture a snapshot of our long weekend getaway with my hubby to Mexico City and San Miguel de Allende to celebrate our 25th wedding anniversary.

One question I had was was how to really capture the details. I took way more photos of course so I will also probably complete a photo book but I am very happy to have this documented so close to when we got back! It makes reliving the memories that much more powerful. 

I love the Midori insert because I am able to include the memorabilia that I always collect but often times don't use. To be honest I am a great collector of stuff when I travel so I LOVED being able to include the cards, brochure cut outs and maps I gathered on our trip. 

Without much further ado here is Part II. 

I was able to use some more watercolors, photos and maps. This fold out map came from our wonderful hotel. I forgot to get a clean copy so I ended up having to iron this one ( yes I know a little OCD, but I'm an architect so it is part of the profession!)


I love how the map fold out I was able to include the history of San Miguel de Allende. 


I love these Spanish word wood veneers from Lora Bailora. She's from Spain- I wish I would have know about her before I traveled in 2014. Amy Tan went to teach a class with her in Barcelona.. Now that would have been my nirvana!!


See what I said about using memorabilia in my Midori  - this is a sheet from the note pad from the hotel! I cut out a number of words from the 


Tuesday, July 19, 2016

Anniversary Trip in my Midori

I've been so inspired by all the lovely Midori traveler's notebooks that I have been seeing out there in blog land that I knew it would be perfect to document my anniversary get away with my hubby! I've been working on a project in Mexico City since Jan of 2009 traveling about every month to 6 weeks to Mexico City or DF (Distrito Federal) as they call it. It's been a marvelous experience but that will have to wait for a separate post...I've become good friends with many of my counterparts in DF especially one gal and her hubby (who she met and married since the time I've known her). We were able to plan a last minute get away and she even graciously allowed us to hang out at her apartment! We enjoyed several  days as tourists in Mexico City and then headed out of town for the weekend to San Miguel de Allende, which was recently voted best tourist destination ( my Travel & Leisure mag came with the honor right after we arrived home!). I chose a khaki colored insert because I thought it would go the best with my photos. I used a combination of iPhone 6S plus photos but I also brought my Canon 60D which also made me super happy.


I have some large photos of my hubby (my best subject....) still trying to decide if I am using or not.


I loved this view of the Palacio de Bellas Artes in the center of the City. What I cut off in the picture was a giant line of police that where blocking the entrance to this whole area.  Never did figure out why this happened - this is a little cafeteria on the top floor of the Sears (yes that same Sears) that I just found out about! It was a wonderful little spot to end our day of adventure!


I finally got to take my hubby to Zocalo and got to see some great sites that were new to him. We actually hired a local guide when we were entering the Palacio Nacional. It was a great idea- he was so knowledgeable and even though he really only spoke Spanish- my hubby understands it very well and our guide understood any questions my hubby had in English! He guided us through the Palacio and also through the Templo Mayor - which is a very major archeological museum and amazing that it's located right in the center of the city. 


We also spent some great time in Coyoacan which is at the south end of the city. It used to be its own neighborhood now part of the greater Metro area. We went to the Frida Kahlo museum- I had been before but my hubby had not been. He loved it and the whole neighborhood was amazing. We went to a craft bazaar, had  a wonderful outdoor lunch


A couple of fun flip out - still trying to decide what I will put on the back of this page. I also used the pic stitch app to make some great collages for the album. I always have a hard time deciding on which photos... I always take a lot and I am not very good at purging them when I am done.


I'll be back later this week with my wrap up if this project and what I would do differently for my next Midori!

Have a great Tuesday!