Monday, January 23, 2017

How to Stretch your Digi stash

I shared some ideas on Amber La Bau's blog today  on how to stretch your digital kits

Hi there everyone!
I know that even though we all have a large stash of kits in our digital arsenals - I also know that we all like to use our kits several times for creating to maximize our crafting dollars. There are several ways that we can do this - which is one of the biggest benefits for digi scrapping. In fact, this was one of the primary reasons that I switched to digital scrapbooking back in 2014.  I was a dedicated paper scrapper before then, but the ability to stretch my stash (in a non-space taking type way) was one of the most instant benefits of digital scrapping.
So let's look at a few ways that we can stretch our stash and our digi kit dollars.
  • Use Neutral colored kits to be able to document lots of everyday memories or even bigger stories. Use key elements of your photos or background to pick a primary color - then shop your stash to find a similar predominant color in the kit.
    Stories to Tell kit
    Stories to Tell kit  - neutral colors and elements. Word art can be used for many different kinds of stories.
    Have Coordinates Will Cache - although this is an outdoor kit - there are lots of great neutral papers and elements to use with any kind of photo.
    Have Coordinates Will Cache - although this is an outdoor kit - there are lots of great neutral papers and elements to use with any kind of photo.
  • The Blackbird kit has lots of great neutrals and bold neutral patterns that can be used for many different kinds of stories.
  • Use flexible templates that can be combined and modified.  These templates can be used for patterned papers, photos or even artsy treatments.
    This example reduces the template and then mats with a large border and highlights some of the great patterned paper
    This example reduces the template and then mats with a large border and highlights some of the great patterned paper
    Story Grids Anthology Vol. 2
    Story Grids Anthology Vol. 2

  • Use "themed" kits off theme.  Not every kit needs to be used for the theme that it was initially designed for.  For example, I used this Christmas/Winter kit, A Season to Remember to document some travel photos from our trip to Spain.
    Use a Season to Remember to document some vacation photos.
    Use a Season to Remember to document some vacation photos.
    A Season to Remember
    A Season to Remember
    I hope this gives you some ideas on how to use your kits again and extend your stash even further.  Have fun documenting your memories!                                        

Thursday, January 19, 2017

Birthday Calendar Reference Cards

Amber LaBau Calendar Cards - Holly w/ www.paintedladiesjournal.com

Do you like to use calendar cards in your Project Life Scrapbooks? I decided to incorporate them this year. I always liked the look, but don't always have photos every week, and sometimes I have tons of photos in one week. I'm just all over the place, so I never really included calendar cards. However, I decided to just flow with it this year. I'll put them in when it makes sense! Now that I have the cards for 2017, I thought I could use the 4x6 version that Amber LaBau designed to create a printed reference set that has all the birthdays of people in my life (are you also a card maker?). I will keep this for years, not just 2017. 
Amber LaBau Calendar Cards - Holly w/ www.paintedladiesjournal.com

First, I did some work in Photoshop Elements. I used a pack of "Labely Bits" from Amber LaBau's shop at the Lilypad to add some pops of color to these cards. One thing of note, the calendar cards are in grayscale. You need to change them to color mode (RGB) before adding color. I also recommend picking a scale for the elements you are adding and actually scaling them down on each card, so they are all the same size. You can place them all and then select all at once to scale. (From menu bar: Image>Resize>Scale) Those nice big labels came in a tad too large for the scale of the card. I scaled everything by 50%.

Amber LaBau Calendar Cards - Holly w/ www.paintedladiesjournal.com
Do you like to send snail mail to family & friends on their birthday? I want to do that more. I thought having this handy (note to self: put it in the pocket of my planner) would help remind me. I used Canon Matte Photo paper. One thing I learned about this paper is that it has two different sides. One side is bright white and the other is cream. Make sure you put your paper in your printer correctly!

Happy New Year!

Holly Genc

Friday, December 30, 2016

My Scrapping Goals for 2017


I am so excited for my scrapping to begin in 2017.  I am over the moon excited about 2 big announcements that I get to officially make today!  First I am joining Becky Higgin's Digital Project Life Creative Team!!!!  Yes you heard right - my long time idol Becky...one of my first inspirations in scrapping!  Although her style has changed since her original days at Creating Keepsakes mine has changed too!  I love the Project Life system for documenting the everyday happenings in my life.  I have been religiously documenting since Dec 2011 - 5 whole years... that is crazy!!  So much has changed in my life since then but I have all those things documented for me to remember - and maybe future generations too!! I am so excited to see how my style progresses in 2017 and the inspiration I will garner from this terrific group!


As I mentioned above my style has changed since I first started scrapping back in 1997 (yes that is almost 20 years now........). A few years ago I made the transition to digital scrapping.  I have talked about some of my reasons before.  I was instantly drawn to certain designers when I made that transition - but always at the top of my list was Just Jaimee from The Lilypad - there was something about her quirky fun and colorful designs that just blew me away with every.single.kit.  I stalked her every release (and bought most of them) - I love the work that her CT puts together every month - and now I will get to be part of that team too!!!

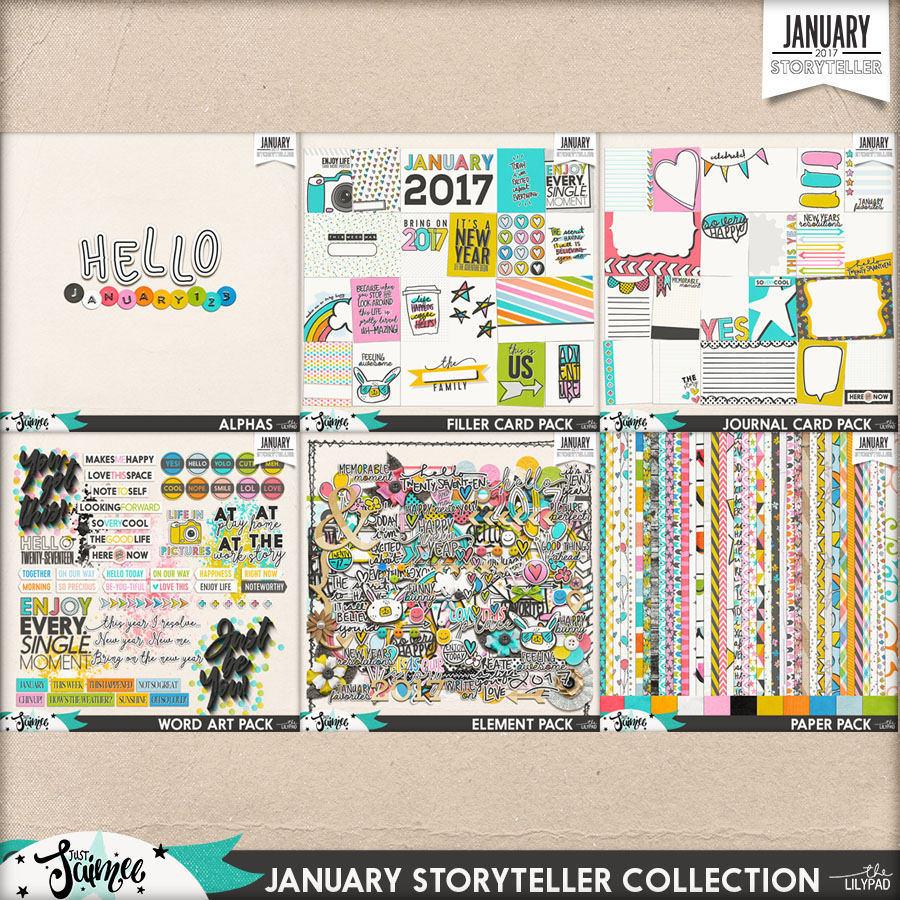
Here is her latest entry - the January Storyteller Kit, isn't it beautiful??


Storyteller 2017 January - The Collection


I can't believe I will get to work with 2 of my favorites in one year!! 2017 is looking up already! Since I will be busy scrapping a lot in 2017 (don't worry I have lots of older photos that can use some attention too!!) it will allow me to work on another one of my 2017 goals to improve my photography. I have lots to document in 2017 and I can't wait to get started! I will be a much more regular presence here on the blog and of course on Facebook and Instagram.

Hope you ring in the New Year filled with hope and enthusiasm - thanks for coming along!


Friday, December 9, 2016

December Daily Catch-Up: Days 3 - 6 with Holly

I'm sharing more of my progress today on December Daily 2016. Go back to this post to see how I set myself up, to do this project as a digi book this year. I am still deciding whether I will print this as a 6x8 book, or print the pages and put them in a binder.
December Daily, by Holly of www.paintedladiesjournal.com

Day 3 was actually a two-parter. We spent the afternoon at Auntie Deb's making dough ornaments, before heading out to the Morton Arboretum Illuminations. I felt both deserved a 2-page spread. The first page features "Holly" papers & elements by Amber LaBau Designs. I'm also using her Story Grid, Vol. 2 (modified) on the left side.

December Daily, by Holly of www.paintedladiesjournal.com

Day 3, Part 2. The Morton Arboretum Illuminations was beautiful!
Credits: Amber LaBau City Sidewalks Pocket Cards & Elements. Ali Edwards' 6x8 December Stories Layered Templates.

December Daily, by Holly of www.paintedladiesjournal.com


Day 4 was another awesome holiday tradition that we just started last year, our trip out to a tree farm to chop down our Christmas Tree! This place is so picturesque, especially with the snowfall we got while there! I loved the horse-drawn wagon ride in the snow with those majestic Clydesdales!
Credits: Sahin Design's Holiday Collection, Template: Story Grids, Vol. 2 (modified) by Amber LaBau Designs.

December Daily, by Holly of www.paintedladiesjournal.com

With so many great photos and memories from Day 4, it got another 2-page spread. I had some sweet pocket cards from The Crafty Pocket. I suggest checking out her shop for some coordinating flair!
Credits: Happy ChristmasStory Grids, Vol. 2 (modified) by Amber LaBau Designs, Holiday Hand-drawn Phrases and Holiday Word Art, Vol. 2 by Ali Edwards.


Day 5, this was our tree trimming, which actually occurred the day before (shhhh!). When there is an event on the day, I put it in that slot. If I don't have anything related to that date, I fill in. This project is about doing what works and not sweating the small stuff. Like Ali Edwards says, "It's about the stories". Credits: MPM, December Wonder  and Ali Edwards' 6x8 layered templates.

December Daily, by Holly of www.paintedladiesjournal.com

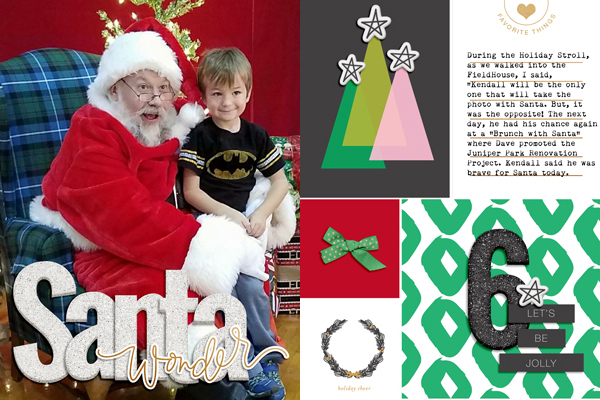
Day 6, Brunch with Santa. Again, this occurred on Saturday, but I'm putting it here and talking about the kids pictures with Santa, or non-pictures.... I'm using the December Wonder MPM (a subscription at the Lilypad).  Most of the cards shown are by Paislee Press. This monthly collection is a collaboration of designers at The Lilypad.

Thanks for catching up with me and December Daily!
Holly | www.paintedladiesjournal.com
Instagram | Facebook


Tuesday, December 6, 2016

Setting Up My Digi "Document Your December"

Have you been enjoying the beginning of your December? Did you decide to do a scrapbook project just for this month? This is only my second year doing one. Last year I created a physical book. I decided to go digital this year. I think it will be very easy to keep up with, especially if I have my digi kit pulled together in one place. And if you haven't started yet, it's not too late! Start now, who says it has to start December 1. Or maybe you've already been taking photos.

I made one folder on my computer called "2016_DYD." I also have a folder under here called "2016_Photos" to dump the pictures into, on a daily (or even weekly) basis! Here's a screenshot of my folder structure:


You need a few basic things to have organized. 
  • Calendar of Events
  • December kit (elements, papers, cards)
  • Template assortment (I'm going with 6x8)
  • Numbering System           

Calendar of Events. I like to look ahead at local events and known commitments we have for the Holiday season and put them on a calendar. I use Google Calendar and make one called "Holiday Schedule". Then, I just google events going on and put them in when they work. You can see that I've got a lot of blank spots. "Elf Mischief" can fill in where needed. There are lots of stories about the holidays that can be told to fill in those days that don't have things going on. Stocking on the fireplace, story behind a specific ornament on the tree, favorite holiday food.


Your December Kit. First, pick your kit. Amber LaBau's new release last month, "City Sidewalks" was just a perfect fit for me. Here's the paper and element kit. Here are the coordinating cards.

You will also see me using this kit in this year's Document Your December. This is Holly Papers and Holly Elements.


Template Assortment. I purchased some of the Ali Edward 6x8 layered templates this year to use for this project. 


I wanted more variety, though. So, I took the Amber LaBau Story Grids and modified them to 6x8. The Story Grid v2 works best for this, but I recommend the whole collection of story grids for 12x12 pages. They are a nice change of pace! They are bundles into two collections. 
Story Grids Anthology | Vol 1 and Story Grids Anthology | Vol 2


I'm also mixing it up with a combination of photo overlays. Ali Edward's combo pack and Amber LaBau's 3x4 overlay set and 4x6 overlay set. These also come as pdf printables, if you are doing a hybrid project.


Numbering System. I wanted an alternative option for number my days (or events). I will also be mixing these Countdown Cards Vol. 1 and Vol. 2. I like that I can used these as cards with journaling, or as stamps over paper or photos. The other great thing about them is that they are not December specific.

December Daily, Holly Genc of  www.paintedladiesjournal.com

Here are a few of my first pages! Our elf arrives on December 1st, so that is my typical first layout...I know the elf gets mixed reviews, but my kiddos are so excited and happy to see him! And that makes me happy.

December Daily, Holly Genc of  www.paintedladiesjournal.com
Day Two was a holiday stroll in our neighborhood. I'm still waiting for the image of the photo with Santa to come from the photographer!
Stay tuned to social media for more layouts all month! @paintedladiesjournal

Sunday, November 6, 2016

How to Add QR codes to Project Life pages


We live in such a multi-media world - videos, music and photo montages are everywhere - and I think they can really enhance our Project Life pages.  Imagine being able to add the video of your child's Christmas pagent performance right along with the photos.  We have been having too much fun here in Chicago with the Cubs winning the World Series.  So along with all the great images that are available on the interwebs I also wanted to add some of the exciting game highlights videos and as well the music that has become a hall mark of this season.  The one that struck me first was a "music" video done by  Eddie Vedder and posted on the official Chicago Cubs site as a thank you to the fans... I know that I will be completing several more pages with the additional QR codes since there are a lot of moments that I want to capture for my grandchildren and the generations after that (..who knows how technology will change but they will have a work around too!)


First thing you need to do is to find the best link - I suggest a YouTube link since that is the largest platform and most tech stable - i.e. is not likely to go away anytime soon! I copy the link from the search bar


After you have the link you open up a QR code generator.  There are several free sites available to do this easily.  I have used both QR Stuff and QR Code Generator.  In this example I am using QR Code Generator.  There are many QR code Generators in the iTunes App store and the Google Play store as well so it doesn't matter what kind of hardware you are using.

Paste the address from the YouTube video in the generator box and then hit the Generate QR Code button. The website does the rest for you.  The QR code generator does the rest and you can download. 


 You can do the same on your phone - that is the great thing about these QR codes - they can be generated right in the palm of your hand. I will show you that next. Using your phone there are a couple of easy steps that are similar.

You find the YouTube video that you want to generate the QR code for. There is an arrow button at the top that will bring up a screen where you can copy the link.


Next you can you go the QR code generator app and paste the address where is says URL and hit done:


Finally the QR code appears and you can hit the share button on the top right corner and then you can save the image to your camera roll.


There are lots of programs that will allow you add images to your photos or even completed Project Life app pages. I really enjoy using Photo - a free program although there are others that can do this as well.  In this program you can even upload you own fonts ( I even uploaded my own handwriting font) to add more text or larger titles. It also allows you to layer on a QR code.  


Use the Add Image button to select your QR code


Finally - size and place the image where it works on your layout or photo.

Here is 1 more example where I added a QR code to document the Marching Band parade..


Hope you enjoyed this tutorial!


Monday, October 31, 2016

Halloween Hybrid Mini-Book

HAPPY HALLOWEEN!! I made this fun little hybrid mini-book using Amber LaBau's Thirty-One collection (collaboration with Sara Gleason), earlier this week. I'm so excited to share with you how easy this is for anyone to do.

Halloween Hybrid Mini-Book using "Thirty-One" by Amber LaBau Designs & Sara Gleason. Created by Holly www.paintedladiesjournal.com
I chose to make mine a 4x6 book. The first thing I did was pick out which Thirty-One papers that I wanted to use. Then, I cropped them to 4x6, so the patterns would be the right scale. 

"Thirty-One" by Amber LaBau Designs & Sara Gleason

I laid them out on an 8.5" x 11 canvas in Photoshop Elements (my software of choice). I added some of the word strips and other elements that would be easy to cut out by hand to the extra room left over. 

Halloween Hybrid Mini-Book using "Thirty-One" by Amber LaBau Designs & Sara Gleason. Created by Holly www.paintedladiesjournal.com

I glued my 4x6 papers back to back to make the pages. One tip: First create your layout and then glue them together, being careful nothing is upside down as you flip pages. This way, if you want to use your tiny attacher, your staples are hidden on the inside. 

Halloween Hybrid Mini-Book using "Thirty-One" by Amber LaBau Designs & Sara Gleason. Created by Holly www.paintedladiesjournal.com

I used my Canon Pixma and Silhouette to print-n-cut most of the elements I used on these pages.  I like to use the PicStitch App to create 4x6 photo collages with white borders to cut down for these smaller pages.

Halloween Hybrid Mini-Book using "Thirty-One" by Amber LaBau Designs & Sara Gleason. Created by Holly www.paintedladiesjournal.com

Once I had all the pieces, this album went together very quickly. And it was so fun to do! The pages go together easily when you have a coordinated kit like this. That little black cat card (love!!) is from the Thirty-One Cards, which I scaled down a little to fit better on my 4x6 album.

Halloween Hybrid Mini-Book using "Thirty-One" by Amber LaBau Designs & Sara Gleason. Created by Holly www.paintedladiesjournal.com

I added some black stickles on top of the BOO letters to give it a little more sparkle. The ghosts were from the Thirty-One Elements & Paper Pack. These are my favorite! I put a bunch on an 8.5"x11" canvas in PSE (Photoshop Elements), flipping some so they would be flowing in both directions. Then, I printed them on vellum. I hand cut these. The Silhouette can cut vellum, but I believe you need special vellum made by Silhouette.

Halloween Hybrid Mini-Book using "Thirty-One" by Amber LaBau Designs & Sara Gleason. Created by Holly www.paintedladiesjournal.com

Last page! I plan to add a few pages from past and present to show the different costumes over the years. Hope everyone has a fun and safe Halloween!

Holly Genc www.paintedladiesjournal.com
Instagram | Facebook | Pinterest

I've listed a few affiliate links to supplies I like to use below:

My favorite apps for editing photos and creating 3x4 collages:

PICTAPGO for editing. The lighten is awesome on any photo.
PicTapGo - Totally Rad! Inc.

PICSTITCH (paid version is needed to create thicker white borders - so worth it) for collages.
Pic Stitch - #1 Photo and Video Collage Maker - Big Blue Clip, LLC


  CANON MG7520 Wireless Color Cloud Printer with Scanner and Copier, White (Discontinued By Manufacturer)


  Canon Photo Paper Plus Glossy II, 4 x 6 Inches, 400 Sheets (2311B031)


Canon Photo Paper Matte, 8.5 x 11 (50 sheets) - I used this to print my papers and elements on the Pixma Printer listed above. I love the quality!


Tim Holtz Tiny Attacher


Black & White Grosgrain Ribbon (so versatile!)


Metal Book Rings for binding your mini-books. These are 2".

Towbow Permanent Tape Runners - These are the ones I use. Be sure to use permanent tape in a book like this. Also, you need to apply liberally along each edge.